
In this article
- Why Cats Need Regular Nail Trims
- How Often Should You Trim Your Cat’s Nails
- Tools You Need for Cat Nail Trimming
- Getting Your Cat Comfortable with Paw Handling
- Step-by-Step Cat Nail Trimming Technique
- Avoiding the Quick
- What to Do If You Cut the Quick
- The Two-Person Technique
- The Towel Wrap Method
- Indoor vs. Outdoor Cats and Nail Wear
- When to Use a Professional Groomer or Veterinarian
- Frequently Asked Questions
Cat nail trimming ranks near the top of tasks that cat owners dread most — right alongside giving medication and bathing. The mere sight of nail clippers can send some cats scrambling under the bed, and the memory of a bad experience can make owners equally reluctant to try again. But overgrown claws are not just an inconvenience. They can snag on fabric, split painfully, curve into paw pads, and cause infections that require veterinary treatment. The good news is that with the right tools, proper technique, and a patient approach, cat nail trimming can become a calm and routine part of your cat’s grooming schedule.
Whether you have just adopted your first cat or have been trimming claws for years and want to improve your technique, this guide walks you through everything you need to know — from understanding why trims matter to handling the worst-case scenario of cutting too short.
Why Cats Need Regular Nail Trims
In the wild, cats wear down their claws naturally through climbing, hunting, scratching rough surfaces, and walking on abrasive terrain. Domestic indoor cats do not get nearly enough of this natural wear. Scratching posts help, but they primarily condition the outer sheath of the claw rather than shortening the sharp tip. Without regular cat nail trimming, claws continue to grow in a curved arc that eventually circles back toward the paw pad.
Overgrown nails create several problems. Long, sharp claws catch on carpet, upholstery, bedding, and clothing. A snagged claw can tear partially or completely, causing bleeding and pain. In severe cases, a nail that has grown too long will pierce the paw pad, embedding into the soft tissue and creating an entry point for bacteria. This is especially common in older cats and cats with extra toes (polydactyl cats), where dew claws or extra digits are easy to overlook during routine checks.
Regular cat nail trimming also protects you and your family. Even a friendly, well-socialized cat can accidentally scratch during play, kneading, or jumping on and off laps. For households with young children, elderly family members, or immunocompromised individuals, keeping claws trimmed is an important safety measure. It also protects your furniture — while scratching behavior is natural and healthy, shorter nails cause significantly less damage to sofas, curtains, and woodwork.
How Often Should You Trim Your Cat’s Nails
Most cats need their nails trimmed every two to four weeks. The exact frequency depends on several factors: your cat’s age, activity level, whether they live indoors or outdoors, and how quickly their individual nails grow. Kittens’ claws grow faster and are needle-sharp, so they may need trimming every one to two weeks. Senior cats, whose claws tend to become thicker and more brittle with age, also benefit from more frequent attention because their reduced activity means less natural wear.
A simple way to check whether your cat is due for a trim is to look at the claws when the cat is resting. If the tips extend well beyond the paw and you can see sharp, hooked points, it is time. You can also listen — if you hear clicking when your cat walks on hard floors, the nails are too long. Another test is the furniture snag: if your cat’s claws catch on fabric when they walk across a blanket or cushion, trimming is overdue.
Rather than letting nails grow long and then doing a major trimming session, it is far better to trim a small amount frequently. Short, regular sessions keep the quick (the blood vessel inside the nail) from advancing too far forward, making each future trim easier and less risky. Frequent trimming also keeps your cat more accustomed to the process, reducing stress for everyone.
Tools You Need for Cat Nail Trimming
Having the right equipment makes cat nail trimming safer, faster, and less stressful. You do not need an elaborate setup, but using the correct type of clipper matters more than most owners realize.
Scissor-style clippers are the most popular choice for cat nail trimming. They look like small scissors with curved, notched blades designed to fit around a cat’s claw. They provide good visibility and precise control, making them ideal for beginners. The curved cutting edge follows the natural shape of the nail, reducing the chance of crushing or splitting.
Guillotine-style clippers have a hole where you insert the nail tip, and a blade slides across to cut when you squeeze the handle. Some owners find these easier to use for very small or very thick nails, but they require more precise positioning and can crush the nail if the blade is dull. They are generally better suited to experienced trimmers.
Nail grinders (rotary tools) use a small spinning stone or sandpaper drum to file down the nail gradually rather than cutting it. Grinders eliminate the risk of cutting the quick and produce smooth, rounded edges. However, the noise and vibration bother many cats, and the process takes longer per nail. Some owners use grinders to smooth edges after clipping.
Styptic powder is a must-have supply that you should keep within arm’s reach during every trimming session. If you accidentally cut the quick, styptic powder stops the bleeding almost immediately by contracting blood vessels and promoting clotting. Cornstarch or flour can work in a pinch, but styptic powder is faster and more reliable. Buy a small container and keep it wherever you store your clippers.
Treats are as essential as the clippers themselves. High-value treats — whatever your cat finds irresistible — are your primary tool for creating positive associations with cat nail trimming. Have them ready before you start, use them throughout the process, and give a generous reward when the session ends.
Getting Your Cat Comfortable with Paw Handling
The single biggest mistake owners make with cat nail trimming is skipping the desensitization phase. Grabbing a cat’s paw and immediately trying to clip sends most cats into fight-or-flight mode. Cats are protective of their paws — they are sensitive, vulnerable, and essential for balance, climbing, and defense. Earning your cat’s trust around paw handling takes time, but it pays off enormously in calmer, faster trimming sessions for years to come.
Start by simply touching your cat’s paws during relaxed moments — while they are purring on your lap, drowsy after a meal, or settled into a favorite napping spot. Do not grab or squeeze. Just rest your hand on the paw gently and offer a treat. If your cat pulls away, let them. Do not chase the paw or hold it down. The goal is for your cat to learn that a hand on the paw predicts good things.
Over the course of a week or two, gradually increase the interaction. Progress from resting your hand on the paw to gently pressing the pad to extend the claws, just as you would during actual trimming. Press, hold for one second, release, and treat. Repeat this across multiple short sessions — two to three minutes at most — until your cat barely reacts to having their claws extended.
Next, introduce the clippers without using them. Let your cat sniff them. Set them on the floor near your cat. Pick them up and put them down while petting your cat. Then hold them near your cat’s paw while pressing a pad to extend a claw — but do not cut. Squeeze the clippers in the air so your cat hears the sound while you are gently holding a paw. Treat after each step. This entire desensitization process might take two to three weeks, and every minute of it is time well spent.
Step-by-Step Cat Nail Trimming Technique
Once your cat is comfortable with paw handling and the presence of clippers, you are ready to start trimming. Choose a time when your cat is calm and relaxed — after a meal or a play session is ideal. Never attempt cat nail trimming when your cat is wound up, agitated, or in the middle of a zoomies episode.
Step 1 — Position your cat. Place your cat on your lap facing away from you, or on a table or counter at a comfortable height. Some cats do best cradled in the crook of your arm. The key is that both you and the cat are comfortable and you have easy access to the paws.
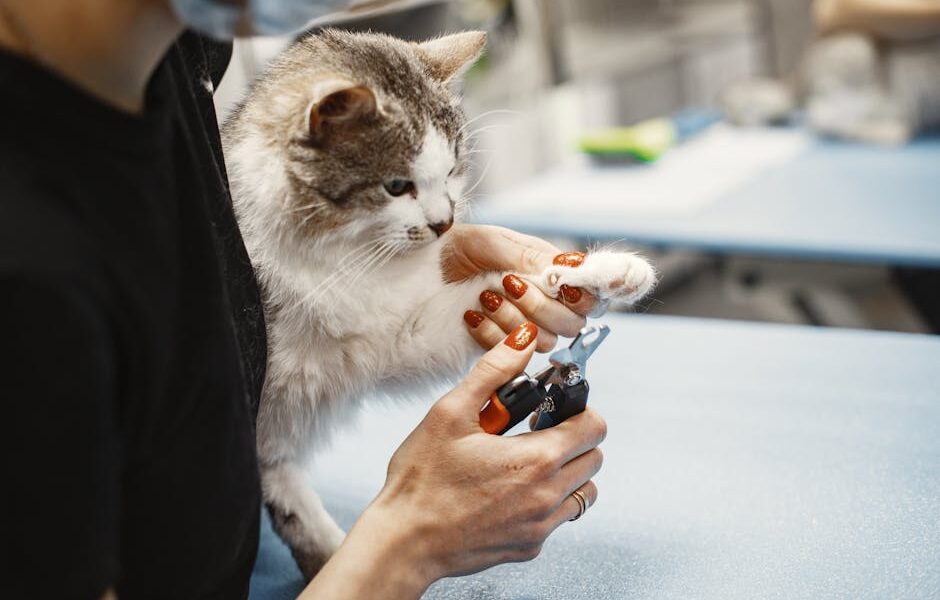
Step 2 — Take one paw gently. Hold the paw in your non-dominant hand. Use your thumb on top of the paw and your index finger on the pad below. Gently press the pad to extend the claw. The nail should slide forward, fully visible and separated from the fur.
Step 3 — Identify the quick. Look at the extended claw. In cats with light-colored nails, you can see the quick as a pinkish area inside the nail — the blood vessel and nerve run through it. The transparent or white tip beyond the quick is the safe zone for cutting. In cats with dark nails, the quick is harder to see. When in doubt, cut less. You can always trim more, but you cannot undo a cut that goes too deep.
Step 4 — Position the clippers. Hold the clipper in your dominant hand. Position the blade perpendicular to the nail — not parallel to it, which can cause splitting. The cutting edge should cross the nail from side to side, not from top to bottom.
Step 5 — Cut the tip. Make a single, confident cut through the tip of the nail, removing only the sharp, curved hook. Aim to cut approximately two millimeters in front of where you estimate the quick ends. A decisive cut is cleaner and less startling to the cat than a slow, hesitant squeeze. If using scissor-style clippers, one smooth motion is all it takes.
Step 6 — Treat and move on. After each nail or every two to three nails, offer a treat and a calm word of praise. Watch your cat’s body language. If they are relaxed, continue. If they are tensing up, flicking their tail, or flattening their ears, take a break. There is no rule that says you must do all four paws in one sitting. Doing two paws today and two tomorrow is perfectly fine — and far better than forcing through a full session that traumatizes your cat.
Step 7 — Do not forget the dew claws. Cats have a dew claw on each front paw, located higher up on the inner side of the leg. Because dew claws never touch the ground, they receive zero natural wear and are the most likely nails to overgrow. Always check and trim them during every session.
Avoiding the Quick
The quick is the living part of the nail — a blood vessel surrounded by nerve tissue that runs from the base of the claw partway toward the tip. Cutting into the quick causes pain and bleeding, and it is the single most common reason cats develop a lasting fear of cat nail trimming. Avoiding it is the most important skill to master.
For light-colored nails, identifying the quick is straightforward. Hold the paw up to a light source and you will see a pinkish or reddish core inside the nail. The translucent tip beyond that pink zone is dead nail — that is what you cut. Stay at least two millimeters away from where the pink color ends.
For dark-colored nails, you cannot see the quick directly. Instead, use the shape of the nail as your guide. The hook at the very tip — the thin, curved, often slightly lighter portion — is almost always safe to remove. Cut small amounts at a time and look at the freshly cut cross-section of the nail. If it appears dry and whitish or grayish, you are in dead nail and can continue. If you start to see a small dark dot or a slightly moist, pinkish center, you are approaching the quick and should stop immediately.
The quick grows forward when nails are allowed to get long, meaning that an overgrown nail has a longer quick than a regularly maintained one. If your cat’s nails are significantly overgrown, do not try to cut them back to an ideal length in one session. Instead, trim just the tips every five to seven days. Each trim signals the quick to recede slightly, and over three to four weeks you can gradually bring the nails back to a healthy length.
What to Do If You Cut the Quick
Even experienced groomers occasionally cut the quick. It happens. The most important thing is to stay calm — if you panic, your cat will feed off your stress and panic too. A nicked quick is painful for the cat but it is not a medical emergency.
Apply styptic powder immediately. Dip the tip of the bleeding nail directly into the container of styptic powder, or pinch a small amount between your fingers and press it firmly against the nail tip. Hold gentle pressure for five to ten seconds. The bleeding should stop within thirty seconds to a minute. If you do not have styptic powder, press the nail into a small mound of cornstarch or flour and hold it there.
Stay calm and reassure your cat. Speak in a low, soothing voice. Do not jerk the paw or let go suddenly. Offer a high-value treat immediately after applying the powder. Your goal is to minimize the negative association — your cat experienced a brief pain, but the aftermath was comfort, treats, and calm handling.
Stop the session. Do not continue trimming after cutting the quick. Your cat’s stress level has spiked, and pushing through will make the next session harder. Finish the remaining nails another day. The cat needs time to settle, and honestly, so do you.
Monitor the nail. After the bleeding stops, keep an eye on the nail for the next day or two. It should heal on its own without any intervention. If bleeding resumes, apply more styptic powder. If the nail tip remains swollen, appears infected, or your cat is limping or excessively licking the paw after 24 hours, contact your veterinarian.
The Two-Person Technique
Some cats need a handler and a clipper — one person to provide calm restraint and distraction while the other person trims. This two-person approach is particularly helpful for cats who squirm, cats who have never had their nails trimmed before, and senior cats who may be arthritic and uncomfortable being repositioned.
The handler sits with the cat on their lap or holds the cat on a table, supporting the body gently but firmly against their chest. The handler’s job is to keep the cat feeling secure — not pinned down. One arm supports the cat’s body while the other hand offers treats, gently strokes the chin, or holds the paw in position. The handler speaks softly and watches the cat’s body language for signs of escalating stress.
The trimmer stands or sits to the side with easy access to the paws. Because the trimmer does not need to simultaneously restrain the cat and manipulate the clippers, they can work more quickly and precisely. This division of labor makes the entire session faster, which in turn reduces the cat’s stress. Many couples or family members develop a smooth rhythm with this approach after just a few sessions.
Communication between handler and trimmer is important. The handler should alert the trimmer if the cat is tensing up or about to pull away, so the trimmer can pause rather than risk a bad cut. Short verbal cues like “ready,” “hold,” and “break” keep both people coordinated and the session moving efficiently.
The Towel Wrap Method
For cats who become truly unmanageable during cat nail trimming — thrashing, biting, scratching, and panicking — the towel wrap technique (sometimes called a “cat burrito” or “purrito”) provides safe, gentle restraint that protects both the cat and the owner. It works by limiting the cat’s movement while leaving individual paws accessible.
Lay a large bath towel flat on a table or your lap. Place the cat in the center of the towel, facing you. Quickly but calmly fold one side of the towel over the cat’s body, tucking it snugly underneath. Fold the other side over so the cat is wrapped securely with only their head exposed. The wrap should be snug enough that the cat cannot wiggle free or get a leg out to scratch, but not so tight that it restricts breathing or causes distress.
To access a paw, gently pull it out from the towel wrap one at a time. Trim the nails on that paw, then tuck it back in and pull the next one out. The towel prevents the cat from using the other three paws to scratch you or push the clippers away. Many cats actually calm down once wrapped because the gentle pressure mimics the secure feeling of being in a confined space, similar to the calming effect of a thunder shirt.
A few tips for successful towel wrapping: use a towel the cat has not seen you lay out in preparation (some cats learn to flee at the sight of towel preparation), move swiftly during the wrapping phase so the cat does not escape mid-fold, and always reward generously with treats after unwrapping. If your cat becomes severely distressed — panting, growling, or going rigid — stop, unwrap them, and consider professional grooming as an alternative.
Indoor vs. Outdoor Cats and Nail Wear
Whether your cat lives strictly indoors, has outdoor access, or is an indoor-outdoor cat significantly affects how often they need cat nail trimming and how their claws naturally maintain themselves.
Indoor cats need the most frequent trimming. Walking on soft carpets, hardwood floors, and furniture provides minimal nail wear. Even with scratching posts, indoor cats typically need trims every two to three weeks. Their nails tend to be sharper because the tips are not blunted by rough outdoor surfaces. If you are exploring breeds that do well indoors, our cat breeds directory can help you find the right match — and every breed listed there will benefit from regular nail maintenance.
Outdoor cats experience more natural nail wear from climbing trees, walking on concrete and asphalt, digging in soil, and scratching on rough bark and fence posts. Some outdoor cats maintain their claws well enough that trimming is rarely needed. However, you should still check their nails regularly, particularly the dew claws, which do not contact the ground and will overgrow regardless of outdoor activity. Outdoor cats also face the consideration that sharp claws help them climb to escape predators and defend themselves, so some owners choose to trim less aggressively on outdoor cats.
Indoor-outdoor cats fall somewhere in between. Their nails wear down during outdoor time but may still need periodic trimming, especially during seasons when they spend more time indoors. Winter months, rainy seasons, and extreme heat can keep cats inside for extended periods, and nails grow quickly during these stretches of reduced activity. Checking nails every two weeks and trimming as needed is a good baseline for indoor-outdoor cats.
Regardless of lifestyle, senior cats across all categories need more frequent nail checks. Aging cats become less active, scratch less, and their nails may thicken and become more brittle. Overgrown nails in elderly cats are one of the most common findings during veterinary wellness exams, and they are entirely preventable with regular at-home care.
When to Use a Professional Groomer or Veterinarian
There is no shame in outsourcing cat nail trimming to a professional. Some cats are simply too anxious, aggressive, or difficult for safe at-home trimming, and forcing the issue risks injury to both the cat and the owner — not to mention destroying any future chance of cooperative grooming.
Consider professional help in the following situations. Your cat becomes genuinely aggressive during trimming — not just squirmy, but biting, hissing, and lashing out with intent to harm. You have a cat with very dark nails and you are not confident identifying the quick. Your cat has a medical condition — arthritis, a recent injury, or a neurological issue — that makes home handling painful or risky. You adopted a cat with severely overgrown or ingrown nails that need careful correction before routine maintenance can begin. Or you simply feel too anxious yourself, because cats read human stress accurately and your nervousness will amplify theirs.
Veterinary clinics and professional cat groomers typically charge a modest fee for nail trims — usually between ten and twenty-five dollars per session. Many veterinary offices will trim nails during routine checkups at no additional charge. Some mobile groomers offer house-call nail trimming, which eliminates the stress of car travel for cats who are particularly anxious outside their home environment.
If your cat needs sedation for nail trims, that is a conversation for your veterinarian rather than a groomer. Some cats have anxiety levels that make conscious restraint inhumane, and a mild sedative administered by a vet can make the experience painless and forgettable. This is more common than many owners realize, and it is a perfectly valid approach.
Looking to adopt a cat and wondering about grooming needs? Ask the shelter or rescue about the cat’s history with nail trimming. Many rescue organizations note grooming tolerance in their records, which helps you prepare for what to expect at home.
Frequently Asked Questions
Can I use human nail clippers on my cat?
You can use small, sharp human nail clippers on kittens and cats with thin nails. They work in a pinch. However, dedicated cat nail clippers are designed for the shape and thickness of feline claws, providing a cleaner cut with less risk of splitting or crushing. For regular cat nail trimming, invest in a proper pair of cat clippers — they are inexpensive and last for years.
How many nails do cats have?
Most cats have 18 nails — five on each front paw (including the dew claw) and four on each back paw. Polydactyl cats have extra toes and therefore extra nails, sometimes as many as seven or eight per paw. Every nail needs to be checked and trimmed, including the often-forgotten dew claws on the front paws.
Do I need to trim my cat’s back nails?
Yes, though back nails tend to grow more slowly and stay somewhat shorter because cats use their hind legs for pushing and jumping, which provides more natural wear. Many owners find they need to trim back nails less frequently than front nails. Check all four paws during each session and trim as needed.
My cat will not let me touch their paws at all. What should I do?
Start the desensitization process described above, but move even more slowly. Touch near the paw — the lower leg — and treat. Over days, move closer to the paw itself. If your cat has a history of trauma or extreme paw sensitivity, consult your veterinarian about anxiety-reducing strategies. Some cats benefit from calming pheromone sprays applied to the trimming area thirty minutes before a session. If progress stalls completely, professional grooming or veterinary nail trims are the right choice.
Is it safe to declaw a cat instead of trimming nails?
Declawing (onychectomy) is the amputation of the last bone of each toe and is widely considered inhumane by veterinary organizations worldwide. It causes chronic pain, behavioral problems, and lasting physical damage. Many countries and several U.S. states and cities have banned the procedure. Cat nail trimming, scratching posts, and nail caps are humane and effective alternatives that keep claws manageable without surgery.
What are nail caps and do they work?
Nail caps are small, soft plastic covers that are glued onto trimmed claws. They prevent scratching damage to furniture and skin while allowing the cat to extend and retract their claws normally. They fall off naturally as the nail grows, typically lasting four to six weeks before needing replacement. Nail caps are a safe option for indoor cats, though some cats dislike the sensation initially and spend time trying to chew them off. They should not be used on outdoor cats who need their claws for climbing and self-defense.
How do I trim an older cat’s thick nails?
Senior cats often develop thicker, harder nails that can be more difficult to cut. Use sharp, high-quality clippers — dull blades will crush rather than cut thick nails. Trim smaller amounts more frequently rather than trying to cut through a large section at once. If the nails are extremely thick or brittle, a nail grinder can be more comfortable for the cat than clippers. Your veterinarian can also demonstrate proper technique for thick nails during a wellness visit.


