
Last updated: May 6, 2026
In this article
- Why Forcing Nail Trims Backfires
- How Counter-Conditioning Works
- Phase 1: Paw Handling for Treats (Days 1-7+)
- Phase 2: Introducing the Clipper Sound (Week 2+)
- Phase 3: Touching the Clippers to the Nail (Week 3+)
- Phase 4: One Nail at a Time (Week 4+)
- Phase 5: Full Trim Sessions (Week 6+)
- The Cooperative Care Mindset
- When to Use Sedation or a Vet Trim
- Adopted Dogs and Unknown Histories
- Frequently Asked Questions
Why Forcing Nail Trims Backfires
Dog nail trimming fear is one of the most common handling problems in pet homes, and it is also one of the most preventable. Most dogs who panic at the sight of clippers are not “stubborn” or “dramatic.” They have either had a bad experience (a deep quick, an angry handler, being held down by force) or they were never taught that nail handling is normal and safe.
The instinct most owners have is to push through the resistance — to wrestle the dog into position, get all four paws done, and “get it over with.” This works for one trim and damages cooperation for years afterward. Each forced session teaches the dog that paw handling is dangerous and that no signal of distress will be heard. Over time the fear escalates from twitching to growling to snapping, and from there to professionals refusing to handle the dog without sedation.
The protocol below is the antidote: a slow, treat-driven counter-conditioning plan that turns paw handling into a positive event. It takes weeks to months, not days. Done properly, it produces a dog who voluntarily offers a paw for trimming, and that cooperative outcome is worth far more than a fast fix.
How Counter-Conditioning Works
Counter-conditioning is the process of changing how a dog feels about something by pairing it with something they love. If clippers always predict good food appearing, the dog’s emotional response shifts over many repetitions from “this is scary” to “this is exciting.” The technique is the same one used to treat thunderstorm phobia, separation anxiety, and reactivity.
The non-negotiable rule is that the dog stays under threshold the whole time. Threshold is the point where fear becomes too intense to learn through. A dog showing wide eyes, lip licking, head turning away, frozen body, or trying to leave is over threshold and is no longer learning to like the clippers — they are learning to endure them.
Each phase below is held until the dog is calm and confident at that step before moving to the next. If a phase takes weeks, it takes weeks. If you skip ahead, you will regress and have to start over from an earlier point.
Phase 1: Paw Handling for Treats (Days 1-7+)
Start with no clippers in sight. The first phase is teaching your dog that having their paws touched predicts something wonderful.
Sit on the floor with high-value treats (small pieces of cooked chicken, hot dog, or freeze-dried liver — not regular kibble). Touch one paw briefly with one finger, then immediately give a treat. Touch the next paw, treat. Repeat with all four paws, two or three times per session, two or three sessions per day.
Once the dog leans into the touch and looks expectantly for the treat, increase the duration: hold the paw for two seconds, then five, then ten. Then add gentle squeezing of individual toes, lifting the paw up to inspect the pad, and pressing on the nail with your fingernail to simulate clipper pressure. Each new step happens only when the previous one is calm and easy.
Most dogs need at least a week at this phase. Reactive dogs who have had bad experiences may need a month or more. There is no rush.
Phase 2: Introducing the Clipper Sound (Week 2+)
Now bring the clippers into the room without using them. Set them on the floor where the dog can investigate, then feed treats. Pick the clippers up, hold them, treat. Open and close the clippers in your hand, treat after each click. Build the association: clipper sight and sound equals good food.
Do not aim the clippers at the dog at this stage. Just let them exist in the same room as something positive. Multiple short sessions (one to two minutes) work better than long ones.
If you use a Dremel rotary tool instead of clippers, this is the phase to introduce the motor sound. Turn the Dremel on across the room, treat, turn it off. Slowly bring it closer over many sessions. Some dogs find the vibration sound harder to tolerate than scissor clippers; see our Dremel vs clippers comparison for help choosing.
This phase is done when the dog hears the clipper sound or sees the tool and looks at you with a happy, expectant expression rather than tucking ears or moving away.
Phase 3: Touching the Clippers to the Nail (Week 3+)
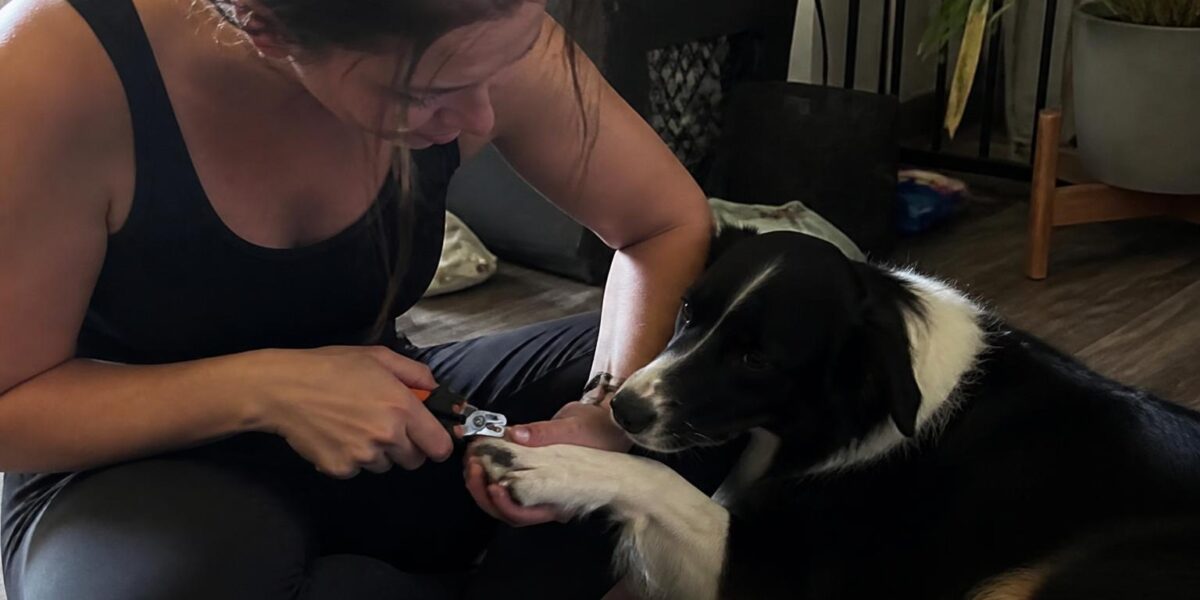
Now combine paw handling and clipper presence. Hold one paw, briefly touch the clipper to the nail without trimming, treat. Repeat with each nail, building up so that the clippers can rest on every nail in turn without any reaction.
Some dogs flinch when the cold metal first touches the nail. That is normal. Treat heavily for the first contact, then make it boring through repetition. This is the phase where many owners get tempted to “just do one quick trim while we’re here” — resist the temptation. The whole point is to disconnect clipper contact from any actual cutting until the dog is fully comfortable with contact alone.
Some trainers add a “consent signal” at this stage — for example, the dog rests their paw in your hand voluntarily, and removing the paw means stop. Cooperative care techniques like these create a working partnership rather than restraint.
Phase 4: One Nail at a Time (Week 4+)
Now you can trim. Pick the easiest nail (often a back nail, where dogs are less guarded). Take a tiny sliver — much smaller than you think you need to. Treat heavily, end the session.
One nail per session, one session per day, for several days. The goal is not to trim all four paws — it is to teach the dog that a single nail trim is brief, painless, and rewarded. Once one nail is reliably easy, move to two nails per session, then three, and so on.
If at any point the dog tenses, pulls back, or shows fear, stop immediately and go back two phases. Pushing through the fear erases the work you have done. Counter-conditioning relies on the dog never being scared. Every time they cross threshold, the protocol resets.
Have styptic powder on hand in case you accidentally take too much and hit the quick. A small bleed is fixable; the emotional damage from a panicked owner reacting badly is harder to undo. Stay calm, apply pressure with the powder, and end the session with treats and a short play break.
Phase 5: Full Trim Sessions (Week 6+)
Once the dog tolerates several nails per session, build up to a full four-paw trim. Even at this phase, breaks matter. Trim two nails, treat, walk away briefly, return for two more. The dog learns that the session is broken into manageable pieces with rewards throughout.
Aim for shorter, more frequent trims rather than long marathons. Many cooperative dogs end up on a schedule of three to four nails every few days, which keeps the pace gentle and the nails consistently short. Long gaps between trims allow the quick to grow longer, which means each trim has to take more nail and the bleeding risk goes up.
Plan for occasional setbacks. A bad experience at the vet, a sudden noise during a trim, or a deep quick can all push the dog back a phase or two. That is normal. Drop back to whatever phase they can handle and rebuild.
The Cooperative Care Mindset
The whole protocol is built on consent. Your dog is a partner in their own care, not a problem to be solved. This sounds soft, but the science behind it is well established: animals who feel they have control over a procedure cope with it dramatically better, and the cooperative behavior generalizes to other handling situations like ear cleaning, tooth brushing, and vet exams.
Pair this protocol with general handling work — touching ears, looking at teeth, lifting tail — and the same trust transfers. Owners who do this in puppyhood (see our puppy grooming guide) prevent the fear from forming in the first place. Owners coming to a fearful adult dog are doing rehab on a problem that should never have happened, but the work still pays off.
If you and your dog are both struggling, a certified force-free dog trainer with experience in cooperative care can teach the protocol hands-on and adjust it for your specific dog. This is a worthwhile investment for severely fearful dogs.
When to Use Sedation or a Vet Trim
For some dogs, especially those with severe trauma history, full counter-conditioning takes longer than the nails can wait. In those cases, vet-administered sedation for nail trims is a humane bridge while you continue the protocol at home. Trazodone, gabapentin, or sileo (dexmedetomidine gel) prescribed by your veterinarian can take the edge off without full anesthesia.
Do not stigmatize using medication. A medicated trim that goes well preserves your relationship with the dog. A forced trim without medication damages it. Talk to your vet about whether short-term anxiolytics make sense while you build the cooperative care foundation.
For dogs with vet-clinic anxiety, see our vet visit anxiety guide for additional support strategies. Muzzle training done with positive associations can also be a useful safety tool for fearful dogs without adding to their stress.
Adopted Dogs and Unknown Histories
Many adopted dogs come with no information about their handling history. Assume the worst until proven otherwise, and start at Phase 1 even if the previous owner said the dog “tolerates” trims. Tolerance and comfort are not the same thing, and a dog who freezes through a trim is not actually comfortable — they have just learned that resistance is futile.
Build the protocol into the first weeks at home as part of bonding and trust-building. The dog is already in a vulnerable adjustment period; gentle, treat-driven handling work fits naturally into that phase. For more on settling in a new dog, see our dog care blog or browse the adopt a dog hub.
Frequently Asked Questions
How long does the full protocol take?
For a mildly fearful dog, two to four weeks. For a severely traumatized dog, two to six months or longer. The timeline is set by the dog, not by your calendar. Trying to rush it makes it take longer in the end.
What if my dog needs nails trimmed urgently and we have not finished the protocol?
Talk to your vet about a one-time sedated trim while you continue counter-conditioning at home. This avoids forcing the dog through a traumatic experience and buys you time to do the work properly.
Can I do this protocol with a puppy?
Yes, and ideally you should. Puppies who are conditioned from eight weeks of age rarely develop nail trimming fear at all. See our grooming puppies guide for the full puppy version.
My dog tolerates trims if I hold them firmly. Why can’t I just keep doing that?
“Tolerating” through restraint usually means the dog has shut down rather than relaxed. The fear is still there and tends to escalate over time. Counter-conditioning teaches genuine cooperation, which is more reliable and far less stressful for both of you.
What if my dog only fears the clippers and not the Dremel (or vice versa)?
Use the tool the dog tolerates better and continue the protocol with that one. You can always add the other tool later through the same conditioning steps. Read our Dremel vs clippers comparison for choosing.
What is the single biggest mistake owners make?
Pushing through fear “just this once” because the nails are too long. That single forced session can erase weeks of careful work. If trimming is genuinely urgent, use vet sedation. If it is not urgent, slow down and stay below threshold.


