
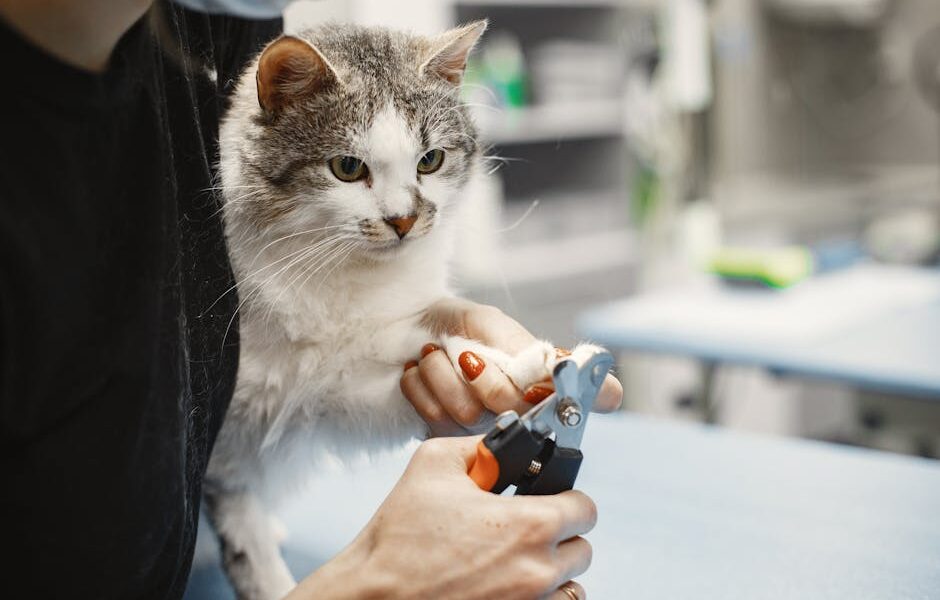
Last updated: March 26, 2026
In this article
- Why You Should Trim Your Cat’s Nails
- Tools You Need to Clip Cat Nails
- Getting Your Cat Comfortable Before Trimming
- How to Clip Cat Nails: Step-by-Step Guide
- Avoiding the Quick: The Most Important Rule
- What to Do If You Cut the Quick
- How Often Should You Trim Your Cat’s Nails?
- Alternatives and Complements to Nail Trimming
- Frequently Asked Questions
Quick Summary: To clip cat nails safely, use sharp cat-specific clippers, hold the paw gently, press the pad to extend the nail, and trim only the transparent tip — staying well clear of the pink quick. Start slow, reward generously, and trim just a few nails per session if your cat is anxious. Most cats need a trim every two to four weeks.
Figuring out how to clip cat nails is one of those tasks that intimidates almost every cat owner at first. Your cat does not want to sit still, you are terrified of cutting too deep, and the whole experience can end with scratched arms and a cat who hides under the bed for three hours. But regular nail trimming is an important part of cat care — and with the right tools, technique, and a little patience, it can become a calm, routine experience for both of you. This comprehensive guide covers everything you need to know, from the reasons nail trimming matters to step-by-step instructions and calming strategies that actually work.
Why You Should Trim Your Cat’s Nails
Indoor cats do not wear down their claws the way outdoor cats do through climbing, hunting, and walking on rough surfaces. Without regular trimming, a cat’s nails grow in a curved arc that eventually circles back toward the paw pad. If left unchecked, an overgrown nail can pierce the pad, causing pain, infection, and difficulty walking. This is especially common in senior cats who are less active and may not use scratching posts as frequently as they once did.
Beyond the health risks, untrimmed nails cause practical problems in your home. Sharp claws snag on furniture, curtains, carpet loops, and clothing. They can accidentally scratch children, guests, or other pets during normal play. Cats with overgrown nails sometimes struggle to retract them fully, which changes their gait and puts strain on their joints over time. Regular trimming keeps your cat comfortable, protects your household, and prevents expensive veterinary visits for nail-related injuries.
If you are thinking about bringing a cat into your family, understanding basic grooming needs like nail care is an important part of responsible ownership. You can browse cats waiting for homes on our adoption page.
Tools You Need to Clip Cat Nails
Before you attempt your first trim, gather the right equipment. Using the wrong tools makes the job harder and increases the chance of injury.
Cat nail clippers: There are three main types. Scissor-style clippers look like small scissors with curved blades and work well for most cats. Guillotine-style clippers have a hole where you insert the nail and a blade that slides across — some owners find these easier to control, but they require more precise placement. Spring-loaded plier-style clippers offer the most leverage and are useful for cats with thick nails. Whichever style you choose, make sure they are designed specifically for cats. Human nail clippers can crush or split the nail rather than cutting it cleanly.
Styptic powder or cornstarch: Keep this within arm’s reach every single time you trim. If you accidentally cut into the quick — the pink blood supply inside the nail — styptic powder stops the bleeding almost instantly. Cornstarch or a clean bar of soap pressed against the nail tip works in a pinch, but styptic powder is more reliable and worth having in your pet first aid kit.
Treats: High-value treats are essential, not optional. You want your cat to associate nail trimming with something positive. Soft, lickable treats or small pieces of cooked chicken work particularly well because they can be offered quickly between nails without breaking the flow of the session.
A towel or blanket: For cats who are especially resistant, wrapping them gently in a towel — sometimes called a “purrito” — can limit movement and help them feel more secure. This is not about restraining your cat forcefully; it is about reducing stimulation and providing a sense of snug comfort.
Getting Your Cat Comfortable Before Trimming
The biggest mistake new cat owners make when learning how to clip cat nails is skipping the desensitization phase. If you grab your cat, pin them down, and start clipping without any preparation, you are setting both of you up for a terrible experience — and your cat will remember it. Cats have long memories when it comes to stressful events, and a bad first nail trim can make every future session exponentially harder.
Start days or even weeks before you plan to actually trim anything. The goal is to teach your cat that paw handling is safe and leads to good things.
Step one — touch the paws casually. During normal petting sessions, gently touch your cat’s paws without applying pressure. If they pull away, let them. Do not chase the paw. Just keep petting and try again a few seconds later. Reward calm acceptance with a treat.
Step two — hold the paw and press the pad. Once your cat tolerates paw touching, practice gently pressing their paw pad to extend the nails. Hold for just one or two seconds, then release and reward. Repeat this over several sessions until your cat barely reacts.
Step three — introduce the clippers. Let your cat sniff the clippers. Set them near the cat during meal times. Open and close them so your cat hears the sound without any paw involvement. Some owners clip a piece of dry spaghetti near the cat’s paw to simulate the sound and sensation of a nail being clipped. Reward your cat for remaining calm around the clippers.
Step four — clip one nail. Just one. Then stop, praise, and deliver the best treat you have. If that goes well, try two nails next time. Build up gradually. There is no rule that says you must trim all the nails in a single session. Many experienced cat owners split the job across two or three days, doing one paw per session, and their cats handle it beautifully because the sessions stay short and low-stress.
How to Clip Cat Nails: Step-by-Step Guide
Once your cat is comfortable with paw handling and the presence of clippers, you are ready for the full process. Choose a time when your cat is relaxed — after a meal or a play session is ideal. Avoid trimming when your cat is wound up, playful, or agitated.
1. Position your cat comfortably. Sit in a well-lit area with your cat on your lap, facing away from you. Some owners prefer placing the cat on a table with a non-slip mat. The key is that you can see the nails clearly and your cat feels stable. If your cat is anxious, a towel wrap with one paw exposed can help tremendously.
2. Hold the paw gently but firmly. Take one paw in your non-dominant hand. Do not squeeze — just support it. Place your thumb on top of the paw and your fingers underneath, cradling the toes.
3. Extend the nail. Press your thumb gently on the top of the toe and your finger on the pad beneath it. The nail will extend outward, giving you a clear view of the full claw. This does not hurt the cat at all when done gently.
4. Identify the quick. Look at the nail in good light. In cats with light or clear nails, the quick is visible as a pink area inside the nail, starting from the base and extending partway down. The transparent or white tip beyond the pink area is the safe zone to cut. In cats with dark nails, the quick is harder to see — in this case, trim only the very tip, removing just one to two millimeters at a time.
5. Cut at a 45-degree angle. Position the clipper blades at roughly a 45-degree angle, matching the natural curve of the nail. Cut decisively with a single, smooth squeeze — do not slowly crush through the nail, as this can cause splitting and discomfort. Trim only the sharp, curved tip. When in doubt, cut less. You can always trim more in a few days.
6. Reward immediately. After each nail — or each paw, depending on your cat’s tolerance — offer a treat and a calm, quiet praise. Keep your voice soft and steady throughout the process. Avoid high-pitched excited tones, which can amp up a nervous cat.
7. Move to the next nail. Repeat the process for each nail. Most cats have five toes on each front paw (including the dewclaw, which is the small nail higher up on the inner side of the paw) and four on each back paw, totaling 18 nails. Many owners only trim the front claws, since the back claws tend to stay shorter on their own and cause less damage to furniture and skin.
8. Stop if your cat becomes distressed. If your cat starts thrashing, growling, hissing, or trying to bite, stop. Do not push through it. Let them go, wait until they are calm again, and try later or the next day. Forcing a trim teaches your cat that nail sessions are something to fear and fight, which makes every future attempt worse.
Avoiding the Quick: The Most Important Rule
The quick is the living tissue inside the nail that contains blood vessels and nerve endings. Cutting into it causes sharp pain and bleeding — and it is the number one reason cats develop a lasting aversion to nail trimming. Understanding how to clip cat nails safely means understanding where the quick is and respecting that boundary every single time.
In light-colored nails, the quick appears as a pinkish area visible through the nail’s translucent shell. Always leave at least two millimeters of nail between your cut and the visible pink area. In dark nails where the quick is invisible, trim in very small increments — just the hook-shaped tip. After each small cut, look at the cross-section of the nail. If you see a pale, chalky white center, you are still in safe territory. If you begin to see a darker, slightly moist-looking center, you are approaching the quick and should stop immediately.
One important detail that many guides overlook: the quick grows longer when nails are not trimmed regularly. If your cat’s nails have become very long, you cannot simply cut them back to an ideal short length in one session. You need to trim the tips every one to two weeks, which gradually encourages the quick to recede. Over the course of a month or two of regular trims, you can bring overgrown nails back to a healthy length without ever touching the quick.
What to Do If You Cut the Quick
It happens. Even experienced groomers and veterinarians occasionally nick the quick. The important thing is to handle it calmly and correctly so that one mistake does not traumatize your cat or create a lasting fear of nail trims.
Stay calm. Your cat reads your energy. If you gasp, panic, or start frantically grabbing at their paw, you will escalate the situation. Speak in a soft, reassuring voice.
Apply styptic powder immediately. Dip the bleeding nail directly into the powder or press a pinch of it firmly against the nail tip. Hold gentle pressure for about 30 seconds. The bleeding should stop within a minute or two. If you do not have styptic powder, cornstarch or flour can work as a temporary substitute — pack it against the nail and hold.
Stop the session. Do not try to finish the remaining nails. Your cat is already stressed from the pain, and pushing forward will only compound the negative association. Give your cat a high-value treat, let them go to a safe space, and finish the remaining nails another day.
Monitor the nail. Check the nail over the next 24 hours for signs of continued bleeding, swelling, or signs of infection such as discharge or your cat licking the paw excessively. A single quick nick almost always heals on its own without complications, but if bleeding does not stop after 10 minutes of consistent pressure, or if the paw becomes swollen or warm, contact your veterinarian.
How Often Should You Trim Your Cat’s Nails?
Most cats need their nails trimmed every two to four weeks, but the ideal frequency depends on your individual cat. Factors that affect how quickly nails grow and how much natural wear they receive include age, activity level, whether they are indoor or outdoor, and how frequently they use scratching surfaces.
Kittens’ nails grow quickly and are needle-sharp — they often need trimming every week or two. Adult indoor cats typically do well on a two- to three-week schedule. Senior cats may need more frequent trims because they are less active and their nails can become thicker and more brittle with age. Outdoor cats who climb trees and walk on concrete or asphalt usually need less frequent trimming, but their nails should still be checked regularly.
A simple test: if your cat’s nails catch on fabric when they walk across a blanket, or if you can hear clicking on hard floors, it is time for a trim. You should also check the dewclaws specifically — because they do not contact the ground, they never wear down on their own and can grow into the pad if forgotten.
Different cat breeds can have different grooming needs. If you are curious about breed-specific care requirements, our cat breeds directory is a helpful starting point.
Alternatives and Complements to Nail Trimming
Nail trimming is the most direct way to manage your cat’s claws, but it is not the only tool in your toolkit. Several options can reduce how often you need to clip and help keep nails in check between trims.
Scratching posts and pads: Scratching is a natural, essential behavior for cats — it helps them shed the outer sheaths of their claws, stretch their muscles, and mark their territory. Providing sturdy scratching posts covered in sisal rope, cardboard scratch pads, or even a section of natural wood gives your cat a healthy outlet and helps keep the front claws from becoming dangerously sharp. Place scratching surfaces near where your cat sleeps, since cats often like to scratch when they first wake up.
Nail caps: Soft plastic caps that are glued over each nail can prevent scratching damage to furniture and skin. They fall off naturally as the nail grows and need to be replaced every four to six weeks. Nail caps are painless and safe when applied correctly, but they do require the cat to tolerate paw handling, and some cats spend the first day or two trying to chew them off. They are a good option for households with small children or immunocompromised individuals where even a minor scratch poses a concern.
Regular play and activity: Active cats who climb cat trees, use scratching posts, and play vigorously tend to maintain shorter nails naturally. Investing in vertical space — cat trees, shelves, and climbing walls — encourages the kind of movement that wears nails down gradually.
Professional grooming: If your cat is truly unmanageable at home despite weeks of desensitization, a veterinarian or professional groomer can trim the nails safely and quickly. Some cats simply do better with a trained stranger than with their owner, and there is no shame in outsourcing this task if it preserves your bond with your cat.
One thing that should never be considered an alternative to nail trimming is declawing. Declawing is not a nail trim — it is the surgical amputation of the last bone of each toe. It causes chronic pain, behavioral problems, and long-term mobility issues. It is banned or restricted in many countries and is opposed by virtually every major veterinary organization. If you are struggling with scratching behavior, the solutions above — regular trimming, scratching posts, nail caps, and environmental enrichment — address the issue humanely and effectively.
Frequently Asked Questions
Can I use human nail clippers on my cat?
It is not recommended. Human nail clippers are designed for flat nails and can crush or split a cat’s curved, cylindrical nail rather than cutting it cleanly. Cat-specific clippers — whether scissor-style, guillotine-style, or plier-style — are shaped to match the curvature of a feline claw and produce a clean cut that does not leave jagged edges. If you absolutely must use human clippers in an emergency, use a small pair and cut only the very tip, but replace them with proper cat clippers as soon as possible.
How do I clip the nails of a cat that will not hold still?
Start with desensitization — the process described in the “Getting Your Cat Comfortable” section above. If your cat is still resistant after weeks of patient training, try trimming while the cat is sleepy or drowsy after a meal. The towel-wrap “purrito” method can also help by limiting movement and reducing visual stimulation. Trim just one or two nails per session rather than trying to do all of them at once. Some owners find that having a second person offer a lickable treat (like a squeeze-up tube) while the other person trims makes a significant difference. If nothing works at home, a veterinarian can trim the nails quickly and can discuss mild sedation options for extremely anxious cats.
Do I need to trim my cat’s back nails?
Back claws generally stay shorter than front claws because cats use their hind legs for pushing off and walking, which provides natural wear. Many owners only trim the front nails and find that the back nails rarely cause problems. However, you should check the back nails regularly — especially the dewclaws if your cat has rear dewclaws, which some cats do. Senior cats and very sedentary indoor cats may need their back nails trimmed as well, since reduced activity means less natural wear.
My cat’s nails are very thick and hard to cut. What should I do?
Thick nails are common in older cats and can also occur when nails have been neglected for a long time. Use plier-style clippers, which provide more leverage than scissor or guillotine types. Make sure the blades are sharp — dull clippers crush rather than cut, which is uncomfortable and can cause the nail to crack or splinter. If the nails are severely overgrown or growing into the paw pad, do not attempt to trim them yourself. Take your cat to a veterinarian, who can safely trim or remove the ingrown portion and treat any infection that may have developed.
How do I know if my cat’s nails are too long?
When your cat is standing on a flat surface with their paws relaxed, the nails should not touch the ground. If you hear clicking when your cat walks on hard floors, the nails are overdue for a trim. Other signs include nails snagging on fabric, the tips curving sharply downward or beginning to curl toward the pad, and your cat appearing uncomfortable when walking or reluctant to use the litter box. The dewclaws deserve special attention — because they never contact the ground, they can grow unnoticed until they curve fully into the pad and cause pain.
Is it okay to trim a kitten’s nails?
Yes, and in fact starting early is one of the best things you can do. Kittens who learn to accept nail trimming at a young age grow into adult cats who tolerate it well. Kitten nails are very small and sharp, so use small, sharp clippers and trim only the tiniest tip. The quick is usually easy to see in a kitten’s translucent nails. Keep sessions very short — one or two nails at a time — and pair every session with treats and gentle praise. If you are adopting a kitten, building this habit early will save you years of struggle.


