
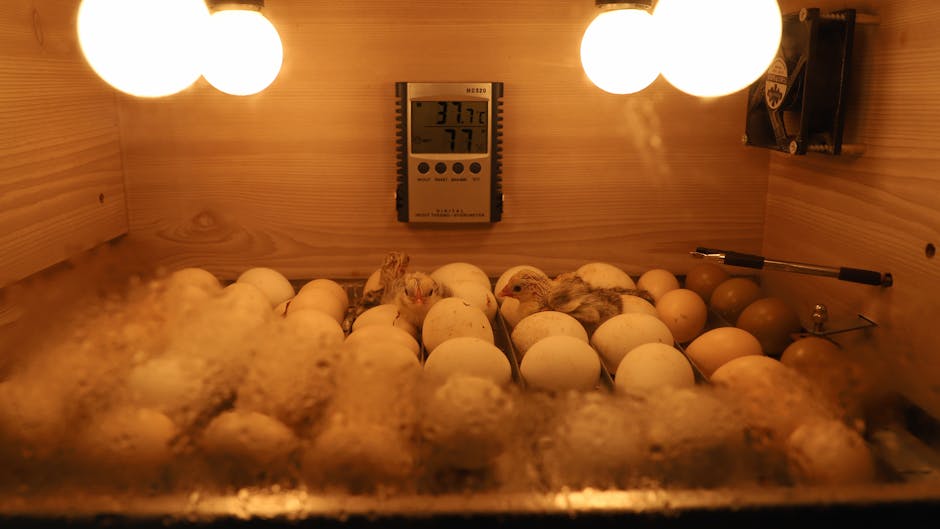
Two Ways to Hatch a Parrot Egg
Parrot hatching happens one of two ways. The biological parents incubate the eggs in their nest box (broody hatching), or a machine maintains temperature and humidity in their place (artificial incubation). Both produce live chicks under the right conditions. Both also produce dead chicks under the wrong conditions. Choosing between them is partly about practical constraints and largely about long-term welfare outcomes.
In this article
- Two Ways to Hatch a Parrot Egg
- Why Parent Incubation Usually Wins
- When an Incubator Is the Right Tool
- Incubator Brands Worth Knowing
- Practical Considerations for Either Method
- Mixing Methods: Pulling for Late Stages
- Candling Protocol Week by Week
- Hatch Assist: Only When Truly Necessary
- Incubator Failure Scenarios and How to Survive Them
- Failure, Loss, and Honest Expectations
- Frequently Asked Questions
For most parrot species in most home aviculture situations, parent incubation is the better choice. Chicks hatched and raised by parents — with optional human handling during the nestling weeks — show better long-term behavior than chicks hatched in incubators and hand-fed from day one. Our piece on hand raising vs parent raising behavior outcomes covers the developmental data behind that.
This article is not a how-to for first-time hatching. It is an overview to help you decide which approach makes sense, and a candid look at when each fits. Hatching is not a casual undertaking — read our piece on parrot breeding ethics and welfare considerations before deciding to produce chicks at all.
Why Parent Incubation Usually Wins
Parent birds adjust temperature and humidity micro-by-micro across the day. They turn the eggs many times per hour. They communicate with the embryo through low vocalizations in late incubation that the chick begins to recognize. They sit close on hatch day and assist the chick during pip and zip. They feed crop milk in the first hours after hatch — a substance no commercial formula fully replicates.
The outcomes show up in hatch rate and in long-term chick health. Parent-incubated clutches in well-managed aviaries typically out-hatch artificially incubated clutches of the same species. The chicks that survive both methods tend to be developmentally similar in the first weeks, but the behavioral divergence appears later — incubator-hatched, fully hand-reared birds show more separation issues, hyperbonding, and hormonal problems in adulthood.
The exception is when parents fail. Abandonment, broken eggs, aggressive parents, or first-time pairs that do not know what to do happen often enough that responsible breeders have a backup plan. An incubator is that plan, not a default.
When an Incubator Is the Right Tool
Incubators earn their keep in several scenarios.
Parental abandonment. A pair may abandon eggs partway through incubation due to stress, illness, or simple inexperience. Eggs cool quickly. If you find cold eggs, candling can show whether the embryo is still viable, and an incubator can finish the job.
Cracked or contaminated eggs requiring fostering. A damaged eggshell that can be repaired benefits from controlled conditions during the repair window.
Aggressive or unstable parents. Some bonded pairs damage eggs or chicks. When the parents cannot be trusted with their own clutch, artificial incubation followed by hand-rearing is the only path to live chicks. This is also a strong signal that the pair should not be bred again.
Conservation and research contexts. Endangered species breeding programs use incubators to maximize hatch rate from limited eggs, often combined with foster parents from related species.
Infertile egg replacement programs. Some breeders pull fertile eggs and replace them with dummy eggs to control clutch size, then return chicks at hatch or after hatch — a niche approach used in some species to manage reproductive load on hens.
Incubator Brands Worth Knowing
Three brand families dominate the home and small-aviary market. Each has its place.
Brinsea Mini II and Mini II Advance are entry-level digital incubators suitable for small clutches of small species — budgies, cockatiels, lovebirds, parrotlets. They are affordable, simple to operate, and adequate when the operator pays attention. They have limited capacity and modest temperature stability under variable room conditions.
Brinsea Ovation series sits a step up with better temperature stability, automatic turning, and humidity control. Many serious small-aviary operators use Ovation models for the bulk of their hatching work.
GQF Sportsman series are workhorse cabinet incubators originally designed for game birds and poultry. They scale to large clutches across multiple species. They cost more, take more bench space, and require closer humidity management for psittacine eggs.
Lyon TX-7 and Roll-X models are research-grade incubators with very tight environmental control. They are used by zoos, conservation programs, and a handful of high-volume parrot breeders. Most home breeders will not need this level of precision.
Whatever you choose, the operator matters more than the brand. A diligent operator with a Mini II will out-hatch a careless operator with a Lyon. Calibrate every thermometer and hygrometer against a reference instrument before trusting the readings.
Practical Considerations for Either Method
Whether you go broody or artificial, several considerations apply.
- Nest-box setup matters. Species-appropriate dimensions, materials, and placement determine whether broody parents will commit. See our piece on parrot co-parenting flock dynamics and nest box for nest-box guidance.
- Candling. Both methods require candling — shining a light through the eggshell — at intervals to confirm development. Learn from a mentor before relying on it.
- Hatching takes time. A chick may take twelve to forty-eight hours from initial pip to full zip. Resisting the urge to “help” is a discipline most beginners fail. Premature intervention is a leading cause of chick death.
- Backup brooder. Whatever your incubation method, you need a chick-stage brooder ready for the moment hatching is complete and the chick needs to dry off and stabilize.
Our piece on parrot egg incubation temperature, humidity, and turning covers the species-specific parameters that matter for artificial incubation.
Mixing Methods: Pulling for Late Stages
Some breeders use a hybrid approach. Parents incubate from lay through most of the term, and the breeder pulls eggs in the last few days before hatch to finish in an incubator. The argument is reduced risk of damage during the most vulnerable phase. The counter-argument is that you also lose the parent vocalizations and crop-milk feeding immediately after hatch.
Other breeders pull at hatch — letting parents finish hatching, then removing chicks immediately for hand-rearing. The chicks get crop milk for the first hours but lose subsequent parent care. This approach is associated with the same long-term behavior issues as full incubator hatching and is increasingly considered welfare-suboptimal in modern aviculture.
The most common modern recommendation is to leave eggs and chicks with the parents through fledging when possible, with daily human handling sessions starting around week two or three.
Candling Protocol Week by Week
Candling — shining a focused light through the eggshell to observe internal development — is the most informative non-invasive check available during incubation. Done correctly, it confirms fertility, tracks embryonic progress, and lets you remove non-viable eggs before they spoil and contaminate the rest of the clutch. Done carelessly, it disturbs parents, chills eggs, and can damage developing membranes.
Day 0 to 3. Too early to see much. Wait for the embryo to develop visible structures before disturbing the clutch.
Day 5 to 7 — vessel check. A fertile, developing egg shows a small dark spot (the embryo) surrounded by a spider-web pattern of blood vessels radiating outward. Infertile eggs remain clear with only the yolk visible. Eggs with early embryonic death often show a blood ring — a distinct circular vessel pattern with no central embryo. Mark suspect eggs lightly with pencil and recheck in 48 hours rather than removing on first impression.
Day 10 to 14 — movement. By mid-term, the embryo fills more of the egg, the air cell at the blunt end has grown, and movement is sometimes visible when the egg is candled briefly. Vessels remain prominent. Eggs that have stopped developing show a dark mass that does not move and may have drawn away from the shell.
Day 18 to 21 (species-dependent late term) — air cell and draw-down. The air cell expands and may begin to “draw down” — slope unevenly as the chick orients for hatch. The shell becomes harder to see through as the chick fills most of the egg. Stop candling in the final days before expected hatch to avoid disturbing positioning.
Keep candling sessions short — under thirty seconds per egg — and warm. Return eggs to the incubator or parent box promptly. Use a candler designed for the task; flashlight LEDs that generate heat can damage developing embryos.
Hatch Assist: Only When Truly Necessary
The biggest mistake new hatchers make is helping a chick that did not need help. Hatching is supposed to be slow. From the moment a chick first pips — pokes a small hole through the inner membrane into the air cell — to full external zip can run twelve to forty-eight hours depending on species. Internal pip vocalizations may be heard a day before any external sign. None of that is failure. It is normal.
Premature assistance bypasses the chick’s final absorption of the yolk sac and the retraction of the chorioallantoic membrane’s blood vessels. Pulling a chick out before that biology completes typically causes fatal hemorrhage, yolk-sac infection, or a chick that survives the first hour but dies in the next twenty-four. Patience is the protocol.
The narrow set of cases where assistance is sometimes warranted involves “shrink-wrapping” from low humidity (membrane dries and traps the chick), malposition confirmed by candling and an experienced mentor, or a chick that has been stuck mid-zip for many hours past the species norm. Even then, assistance is incremental — moistening the membrane, removing tiny pieces of shell over the course of hours, watching for bleeding, and stopping immediately if any blood appears. Do not attempt your first hatch assist alone. Have an experienced mentor or an avian-certified veterinarian on a phone or video call. Use our piece on finding an avian certified veterinarian to establish that relationship in advance.
Incubator Failure Scenarios and How to Survive Them
Artificial incubation puts you in charge of a system that the parents would normally regulate. When the system fails, you have minutes to hours to respond. Knowing the failure modes in advance is the difference between losing a clutch and saving it.
Power outage. The most common failure. Eggs cool faster than most beginners expect, especially in winter or in cool rooms. The mitigation is a battery backup or generator with enough runtime to bridge typical outages, plus a thermal-mass strategy — water containers in the incubator absorb heat and slow cooling during the first hour of an outage. In a sustained outage, wrapping the incubator in insulation and placing warm-water bottles inside can extend the safe window. Eggs that drop substantially in temperature for a few hours have survived; do not give up without candling once power is restored.
Humidity miscalibration. Too-low humidity dries the egg and shrink-wraps the chick at hatch. Too-high humidity prevents adequate moisture loss and produces oversized, weak chicks that drown in retained fluid at hatch. Calibrate your hygrometer against a salt-test reference before the season starts, and weigh eggs across incubation to confirm the expected weight loss curve. Different species and altitudes require different humidity targets.
Contamination. Eggs that crack, leak, or harbor bacterial growth contaminate the entire incubator. Remove and isolate immediately. Disinfect the incubator between clutches with a poultry-incubator disinfectant and verify with a swab if you have repeated losses.
Thermostat or turner failure. Both can occur. The mitigation is daily verification with an independent thermometer and a visual check that turning is happening on schedule. Manual backup turning is doable in a pinch but tedious — turn an odd number of times per day so the egg does not rest on the same side overnight.
Many of these are addressed in more depth in our piece on parrot egg incubation temperature, humidity, and turning.
Failure, Loss, and Honest Expectations
Hatching parrots is not reliable even for skilled breeders. Infertility, embryonic death, hatch failure, and early chick mortality are baseline realities. A breeder seeing eighty percent live-hatch rates from confirmed fertile eggs is doing well. Beginners often see much lower rates.
If you experience repeated egg or chick loss, do not press on. Stop, consult an avian-certified veterinarian, and review husbandry, parent health, nutrition, and equipment. Use our piece on finding an avian certified veterinarian to find one with breeding-experience credentials.
Frequently Asked Questions
Should I let my parrots incubate their own eggs or use an incubator?
Let the parents do it when they are healthy, bonded, and willing. Use an incubator only when parents abandon eggs, damage them, or cannot manage the clutch. Parent incubation produces better long-term behavior outcomes.
What is the best incubator for parrot eggs?
Brinsea Mini II and Ovation models cover most home aviary needs. GQF Sportsman scales for larger operations. Lyon models are research-grade. Operator skill matters more than brand.
How long does it take for a parrot egg to hatch?
Species-dependent. Budgies and cockatiels run eighteen to twenty-one days. African greys around twenty-eight days. Macaws twenty-six to twenty-eight days. Always check species-specific parameters before incubating.
Can I help a chick out of its egg?
Almost never. Premature intervention kills chicks. A chick may take twelve to forty-eight hours from pip to zip. Only consult an experienced mentor or avian vet about assisting; do not act on internet videos alone.
What if my parrot pair abandoned their eggs?
Candle to confirm viability, place viable eggs in a calibrated incubator, and call an avian-certified veterinarian to walk you through the remaining incubation and the brooder setup. Abandonment is not unusual and is not a personal failure on the parents’ part.


