
Last updated: May 6, 2026
In this article
How to Teach a Dog to Shake Hands: A Complete Step-by-Step Guide
Quick Answer: Teaching a dog to shake involves luring them to lift their paw with a treat, marking the behavior with a clicker or verbal marker, and gradually adding the verbal cue “shake.” Most dogs can learn this trick in three to seven short training sessions using positive reinforcement. No prior training experience is needed.
Shake is one of the most popular and crowd-pleasing tricks a dog can learn, and it also happens to be one of the easiest to teach. Whether you have a young puppy just starting their training journey or an older dog that could benefit from some mental stimulation, the shake command is an excellent foundation trick that builds communication skills, reinforces the human-dog bond, and introduces the principles of positive reinforcement training that apply to all future learning.
This guide breaks the training process into clear, manageable steps that anyone can follow regardless of prior dog training experience. We will cover what you need before you start, the step-by-step training method, troubleshooting common problems, and how to build on this trick once your dog has mastered it. If you have recently adopted a new dog, teaching shake is a wonderful way to begin building your relationship.
What You Need Before You Start
Gathering the right supplies and setting up the right conditions before your first training session will make the process smoother and more enjoyable for both you and your dog.
High-value treats. The treats you use for training should be something your dog finds irresistible. Small, soft treats that can be consumed quickly are ideal because they do not interrupt the training flow. Pieces of cooked chicken, cheese, commercial training treats, or freeze-dried liver are popular choices. The treats should be small, roughly the size of a pea for medium dogs, to avoid overfeeding during a session. If your dog is on a restricted diet, you can use a portion of their regular kibble or consult your veterinarian about appropriate training treat options.
A clicker or verbal marker. A clicker is a small device that produces a consistent clicking sound used to mark the exact moment your dog performs the desired behavior. If you do not have a clicker, a short, distinct verbal marker like “yes” works just as well. The purpose of the marker is precision: it tells the dog exactly which behavior earned the treat, which accelerates learning.
A quiet training environment. Start in a low-distraction area where your dog can focus. A quiet room in your home is ideal. As your dog becomes more proficient, you can practice in more distracting environments. Avoid starting in a busy park, near other animals, or in any location where your dog is too excited or anxious to concentrate.
A dog that knows “sit.” Shake is taught from the sitting position. If your dog does not yet know sit, teach that first, as it is the most basic command and typically takes only one or two sessions to establish. Having a reliable sit gives you a stable starting point for the shake training.
Short session commitment. Training sessions should last no more than five to ten minutes. Dogs, especially puppies, have limited attention spans, and short sessions prevent frustration for both the trainer and the dog. Multiple short sessions per day are more effective than one long session. Plan for two to three sessions per day, separated by at least an hour.
Step-by-Step Training Method
The following method uses luring and capturing, two of the most effective positive reinforcement techniques. Follow the steps in order, and do not rush ahead until your dog is consistently performing each step.
Step 1: Get your dog into a sit. Ask your dog to sit in front of you. If your dog tends to lie down or stand when you kneel to their level, position yourself on a chair or stool. Reward the sit with a treat to set a positive tone for the session.
Step 2: Present the treat in a closed fist. Hold a treat in your closed hand and present your fist to your dog at their chest height. Your dog will likely sniff your hand, lick it, and nose at it trying to get the treat. Wait. Eventually, most dogs will paw at the closed fist out of frustration or curiosity when sniffing and licking do not work. The moment their paw touches your hand, click or say “yes” and open your hand to give the treat.
Step 3: Repeat until the pawing is consistent. Practice Step 2 multiple times. Within a few repetitions, most dogs begin offering their paw more quickly and deliberately because they have learned that paw contact with your hand produces the reward. When your dog is lifting their paw to touch your closed fist promptly and without hesitation at least eight out of ten times, move to the next step.
Step 4: Transition from closed fist to open palm. Now, instead of presenting a closed fist with a treat inside, present an open palm at the same position. Keep a treat in your other hand behind your back. When your dog places their paw on your open palm, click or say “yes” and reward with the treat from your other hand. This step teaches the dog to offer the paw to an open hand, which is the actual shake gesture.
Step 5: Add the verbal cue. Once your dog is reliably placing their paw on your open palm, begin saying “shake” (or “paw” or “hand,” whatever cue you prefer) immediately before presenting your palm. The sequence is: say “shake,” present your hand, the dog places their paw, you click and treat. After many repetitions, the dog begins associating the word “shake” with the behavior. Eventually, you can say “shake” without presenting your hand first, and the dog will lift their paw.
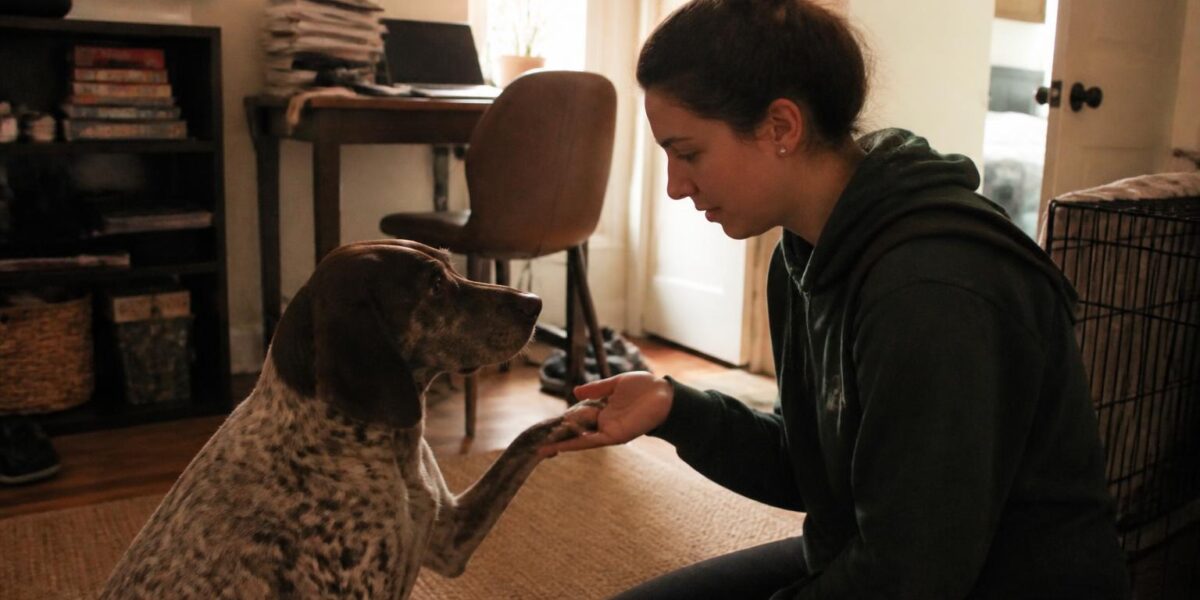
Step 6: Gently hold the paw. As the behavior solidifies, begin gently wrapping your fingers around your dog’s paw when they place it on your palm, mimicking a handshake. Hold for just a second initially, then release, click, and treat. Gradually increase the duration of the hold. If your dog pulls their paw away, you are holding too long or too tightly. Return to a brief, gentle hold and build up slowly.
Step 7: Fade the treats. Once the behavior is reliable on the verbal cue alone, begin reducing the frequency of treats. Instead of treating every shake, reward every other shake, then every third shake, and so on. Replace treats with verbal praise, petting, or a brief play session. The goal is a dog that shakes on cue for the social reward of your attention and praise, with occasional treat reinforcement to maintain the behavior.
Troubleshooting Common Problems
Not every dog progresses through the training steps at the same pace. Here are solutions for the most common obstacles trainers encounter.
My dog will not paw at my closed fist. Some dogs are more mouth-oriented than paw-oriented and will persistently try to lick or nose at your hand rather than pawing. If this happens, try tickling the back of your dog’s leg just above the paw while holding the treat. This often prompts the dog to lift the paw, at which point you can click and treat. Another option is to hold the treat slightly to one side and higher than the dog’s head, causing them to shift their weight and naturally lift the opposite paw. Click and treat the moment the paw leaves the ground.
My dog stands up instead of offering a paw. If your dog breaks the sit position, simply reset by asking them to sit again without giving a treat. Do not punish the standing. When they offer a paw while remaining seated, reward enthusiastically. You may need to hold the treat at a lower position to keep the dog’s center of gravity back. Reviewing different breeds’ physical characteristics in our dog breeds directory can help you understand whether your dog’s size or build might require minor adjustments to hand position.
My dog offers the wrong paw. Dogs typically have a preferred paw, just as humans have a dominant hand. If your dog consistently offers the left paw and you prefer the right, or vice versa, you can work with their natural preference initially and teach the other paw later as a separate trick (often cued as “other paw” or “other hand”). Trying to force a non-preferred paw from the start can slow the learning process.
My dog loses interest quickly. Shorten your sessions. Even three minutes of focused training is productive. Use higher-value treats to increase motivation. Train before meals when your dog is slightly hungry rather than after meals when they are full and less food-motivated. End every session on a successful repetition, even if you need to make the criteria easier to achieve that success.
My dog paws aggressively or scratches. Some dogs get enthusiastic and slap their paw down hard or rake their claws. Do not click or reward rough pawing. Wait for a gentler paw placement, then click and treat. You can also hold your hand lower to reduce the force of the paw’s descent. Over time, by only rewarding gentle paw placements, the dog learns to moderate the intensity.
Building on the Shake Trick
Once your dog has mastered shake, you have established a foundation that opens the door to many related tricks and practical applications.
High five. Transitioning from shake to high five is simple. Instead of presenting your palm face-up, hold it vertically. Your dog, accustomed to targeting your palm with their paw, will naturally adjust to the new orientation. Add a new cue like “high five” to differentiate it from shake.
Wave. A wave is essentially a shake in the air without hand contact. Present your palm for shake but pull it back slightly before the dog’s paw makes contact. The dog’s paw movement through the air looks like a wave. Click and treat the air-pawing motion and add the cue “wave.” This trick is especially charming and always delights onlookers.
Other paw. Once your dog reliably shakes with one paw, teach the same behavior with the opposite paw using a different cue like “other paw.” This develops bilateral coordination and gives you two tricks for the price of one training method.
Nail trimming cooperation. The shake command has a practical application beyond entertainment. Dogs that have been taught shake are often more comfortable having their paws handled, which makes nail trimming, paw inspections, and applying paw balm significantly easier. You can use the shake behavior to condition your dog to accept paw handling by gradually introducing nail clippers and other grooming tools during shake sessions.
Trick chains. Shake can be incorporated into trick chains where the dog performs a sequence of behaviors on a single cue. For example: sit, shake, high five, lie down. Trick chains provide excellent mental stimulation and are impressive to demonstrate.
Tips for Training Dogs of Different Ages
While the basic method remains the same regardless of the dog’s age, adjusting your approach to your dog’s developmental stage will optimize the learning experience.
Puppies (8 weeks to 6 months). Puppies are learning machines with short attention spans. Keep sessions to three to five minutes. Use very small, soft treats. Be patient with the luring phase because puppies may need more repetitions to understand the connection between pawing and the reward. Puppies may also be mouthy during training, so redirect biting to a toy and resume training when they are calm. The good news is that puppies typically learn new behaviors faster than adult dogs when the training is positive and fun.
Adolescent dogs (6 months to 2 years). Adolescent dogs may be easily distracted and test boundaries. They have more energy and may find it harder to sit still. Use very high-value treats to compete with environmental distractions. If your adolescent dog cannot focus, increase exercise before training sessions to take the edge off excess energy. Be prepared for occasional regression where a previously learned step seems forgotten; this is normal during adolescence.
Adult dogs (2 to 7 years). Adult dogs often have the best combination of physical coordination and attention span for learning tricks. Sessions can be slightly longer, up to ten minutes. Adult dogs that have prior training experience may progress very quickly. Adult dogs with no training history may take a few extra sessions to understand the clicker or marker concept, but they catch on fast once the communication system clicks into place.
Senior dogs (7 years and older). Senior dogs absolutely can learn new tricks, contrary to the old saying. Mental stimulation through training is beneficial for cognitive health in older dogs. Adjust for any physical limitations: if arthritis makes paw lifting uncomfortable, keep the required paw height low and the hold duration short. Use softer treats that are easy on aging teeth. Session length should be tailored to the individual dog’s energy and comfort level.
Frequently Asked Questions
How long does it take to teach a dog to shake?
Most dogs learn a reliable shake within three to seven training sessions spread over one to two weeks. Some dogs, particularly those with prior training experience or breeds known for being quick learners, may pick it up in a single session. Puppies and dogs that are new to training may need additional sessions. The key variable is not the dog’s intelligence but the consistency and frequency of practice. Two or three short daily sessions produce results much faster than one weekly session.
What if my dog already paws at me naturally?
If your dog naturally offers their paw when they want something, you have a head start. This behavior is called an “offered behavior” in training terminology, and you can capture it by clicking and treating whenever it occurs, then adding the verbal cue. The challenge with natural pawing is ensuring the dog only does it on cue rather than constantly pawing at you. If unsolicited pawing becomes a nuisance, only reward the behavior when you have asked for it and ignore it when offered without a cue.
Can all dog breeds learn to shake?
Yes, all breeds can learn shake. However, some breeds find it physically easier or more natural than others. Breeds that naturally use their paws frequently, such as Labrador Retrievers, Boxers, and many terrier breeds, often take to shake quickly. Short-legged breeds or dogs with very heavy front-end builds may need minor adjustments to the hand position, but they are fully capable of learning the behavior. There is no breed that cannot physically perform a shake.
Should I teach shake with the left or right paw?
Start with whichever paw your dog naturally offers first. Dogs, like humans, tend to have a dominant side, and working with their natural preference makes the initial learning faster and more enjoyable. Research suggests that roughly half of dogs are right-pawed, a third are left-pawed, and the remainder are ambidextrous. Once the behavior is solid on the preferred side, you can teach “other paw” as a separate trick using the same method but positioning your hand to encourage the opposite paw.
My dog already knows sit and down. Is shake too easy for them?
Shake may be a simple trick, but it serves several purposes beyond the behavior itself. It reinforces the clicker or marker training communication system. It teaches the dog that training is rewarding and fun. It provides a quick, reliable behavior you can use to redirect the dog or warm up before more challenging training. And it is a gateway to more advanced paw tricks like high five, wave, and paw targeting. Even experienced dogs benefit from having a repertoire of easy, well-rehearsed tricks that boost confidence and maintain the training habit.


