
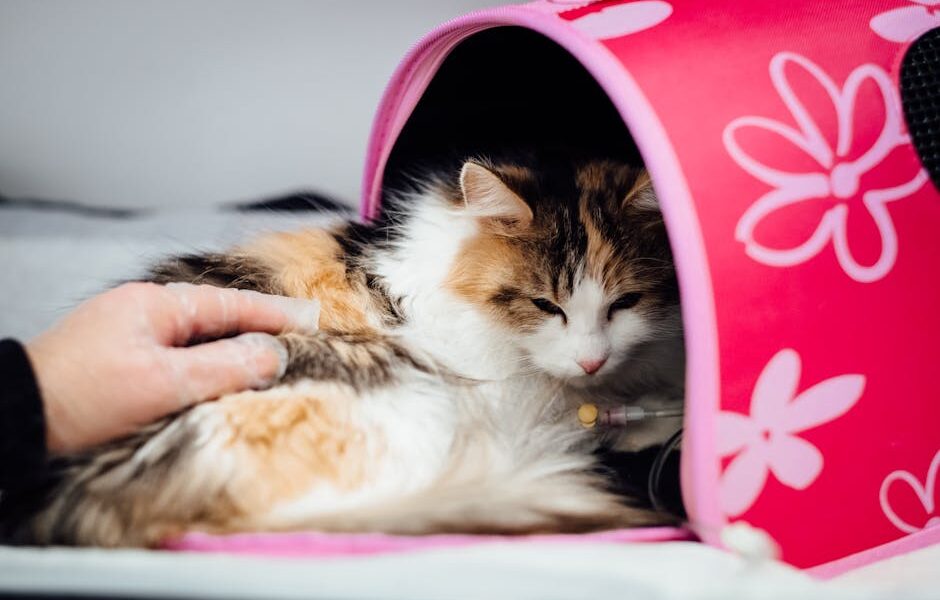
Last updated: May 23, 2026
In this article
How to Get a Cat Into a Carrier: Stress-Free Tips
Few moments in a cat owner’s life produce as much dread as the sound of a carrier door clicking open before a vet visit. The cat vanishes under the bed. You crouch, plead, bribe, and eventually resort to towel-wrapping a furious animal whose trust in you has temporarily evaporated. It does not have to be this way. Cat carrier training — the process of gradually teaching your cat to see the carrier as a safe, familiar space rather than a trap — can eliminate the drama entirely. This guide walks you through every step, from choosing the right carrier to the daily desensitization routine that transforms a dreaded plastic box into a place your cat enters willingly.
Why Cats Hate Carriers
Understanding why your cat fights the carrier is the first step toward fixing the problem. Cats are territorial creatures whose sense of safety is tied to familiar surroundings, familiar scents, and the ability to control their own movements. A carrier violates every one of those instincts. It is a small, enclosed space that smells like plastic, cleaning products, or — worse — a previous stressful trip. Being placed inside one typically means being carried to a car, subjected to unfamiliar motion and noise, and delivered to a veterinary clinic full of strange animals, strange humans, and strange smells.
Most cats only encounter a carrier once or twice a year, and every encounter ends with something unpleasant — a car ride, an examination, or a vaccination. Over time, the carrier becomes a reliable predictor of stress. Your cat is not being dramatic. It is responding logically to a pattern you have accidentally reinforced: carrier equals bad things. Cat carrier training works because it breaks that association and replaces it with a new one — carrier equals treats, naps, and safety.
It is also worth noting that cats have excellent long-term memory for negative events. A single traumatic experience with a carrier — being forced in, hissing, scratching — can create a lasting aversion that persists for years. This is why gentle, gradual desensitization is far more effective than any amount of force. The goal is not to overpower your cat but to change what the carrier means to your cat.
Choosing the Right Carrier
The carrier itself can be a major source of stress or a major part of the solution. Choosing the right one matters more than most owners realize. The ideal carrier for cat carrier training has several key features: a top-loading option, good ventilation, enough room for the cat to stand and turn around, and a design that allows the top to be removed entirely so the bottom half can serve as an open bed during the training phase.
Hard-sided carriers with a top and front opening are generally the best choice for most cats. The top-loading door allows you to lower the cat in gently rather than pushing it headfirst through a narrow front opening — a much less confrontational approach. Look for carriers where the top half unclips completely from the bottom half. During the desensitization period, you will leave just the bottom half out in your home as an open resting spot. Once your cat is comfortable sleeping in the bottom, you can reattach the top and eventually close the door without triggering panic.
Size matters. The carrier should be large enough for your cat to stand up, turn around, and lie down comfortably, but not so large that the cat slides around during transport. For an average domestic cat weighing between 8 and 12 pounds, a carrier roughly 19 inches long, 12 inches wide, and 12 inches tall is a good starting point. Larger breeds like Maine Coons or Ragdolls will need a bigger carrier — check our cat breeds directory if you are unsure about your cat’s expected adult size.
Avoid carriers that are difficult to clean, have poor ventilation, or require you to disassemble them with tools. You want a carrier you can open, wipe down, and reassemble in seconds, because you will be doing it regularly during the training process.
Making the Carrier a Safe Space
The single most important rule of cat carrier training is this: the carrier must live in your home full-time. If the carrier only appears from the closet on vet day, your cat will associate it with stress before you even open the door. Instead, place the carrier — with the door removed or permanently open — in a quiet area where your cat already likes to spend time. A corner of the living room, a spot near a window, or next to your cat’s favorite napping chair are all good locations.
Line the bottom of the carrier with a soft blanket or towel that carries your cat’s scent. If you have a blanket your cat has been sleeping on, place it inside the carrier. You can also rub a clean cloth on your cat’s cheeks — where the scent glands are — and drape it over the carrier or place it inside. The goal is to make the carrier smell like home, not like a store.
Place treats inside the carrier daily. Start by scattering a few treats just inside the opening, then gradually move them further toward the back over the course of several days. Do not rush this process. If your cat will only eat treats at the very entrance of the carrier on day one, that is progress. Within a week or two, most cats will be walking all the way inside to retrieve treats without hesitation.
Feed meals near the carrier as well. Start by placing the food bowl a foot or two from the carrier opening, then move it closer each day until it is just inside, and eventually at the back of the carrier. Cats who eat their meals inside the carrier quickly form a powerful positive association with the space. You are not tricking your cat — you are teaching it that the carrier is where good things happen.
Daily Desensitization Steps
Consistency is what makes cat carrier training work. A few minutes of gentle practice every day is far more effective than a single long session. Here is a step-by-step daily routine that works for most cats, from the most fearful to the mildly reluctant.
Week 1 — Carrier as furniture. Leave the carrier out with the door removed and a soft blanket inside. Place treats near and inside the carrier once or twice a day. Do not interact with the carrier while your cat is investigating it. Let your cat approach, sniff, and enter on its own schedule. If your cat sleeps in or near the carrier during this week, you are ahead of schedule.
Week 2 — Positive reinforcement inside the carrier. When your cat enters the carrier voluntarily, offer a treat or a brief chin scratch while it is inside. Begin feeding one meal a day inside the carrier. Place a favorite toy inside. Continue to leave the door off. The goal this week is for your cat to spend time inside the carrier by choice, not by accident.
Week 3 — Reattach the door. Put the carrier door back on but leave it propped open or secured so it cannot swing shut unexpectedly. Continue treats and meals inside. Let your cat walk in and out freely with the door present but not threatening. By now, your cat should be entering the carrier without hesitation.
Week 4 — Close the door briefly. While your cat is inside eating or relaxing, gently close the door for five to ten seconds, then open it again. Offer a treat immediately after opening the door. Repeat two to three times per session, gradually extending the time the door stays closed — 10 seconds, 30 seconds, one minute, three minutes. If your cat shows signs of distress (meowing loudly, scratching at the door, panting), you have moved too fast. Go back to the previous step for a few more days.
Week 5 — Lift and carry. With the door closed and your cat calm inside, lift the carrier a few inches off the ground. Set it down gently. Treat. Repeat, gradually increasing the distance and duration. Eventually, carry the carrier to another room and back. Then carry it to the car, sit for a minute, and return inside. Then a short drive around the block. Each step should feel like a minor extension of the last, not a dramatic leap.
The entire process typically takes four to six weeks for a cat with moderate carrier anxiety. Kittens and cats with no prior negative experiences may progress faster. Older cats with deep-seated carrier fear may need eight weeks or more. Patience is not optional — it is the method.
Getting Your Cat in the Carrier for Vet Visits
Even with thorough cat carrier training, the vet visit itself requires some planning. Schedule your appointment for a quiet time of day when the waiting room is less likely to be full of barking dogs. Many veterinary practices now offer cat-only appointment blocks or separate waiting areas for feline patients — ask when you book.
On the morning of the appointment, do not change your routine dramatically. Cats are attuned to your behavior, and if you suddenly act nervous or start rearranging furniture, your cat will pick up on the shift. Place a freshly scented blanket in the carrier and scatter a few treats inside. If your cat has been trained using the desensitization steps above, it should enter willingly or with minimal encouragement.
For cats still in the early stages of training or in an emergency, the towel-burrito method is the gentlest fallback. Wrap the cat snugly in a large towel with only its head exposed, then lower it into a top-loading carrier. This is calmer and safer than chasing a frightened cat through the house. Avoid grabbing your cat by the scruff — this is stressful for adult cats and can cause injury.
If you are considering adopting a cat and want to start carrier training from day one, visit our adoption page to meet cats currently looking for homes. Starting carrier training during the initial adjustment period, when everything is already new, is often easier than introducing it to a cat that has lived carrier-free for years.
Calming Sprays and Covers
Pheromone sprays and carrier covers are two of the simplest tools you can add to your cat carrier training routine, and both have meaningful effects on feline stress levels.
Synthetic pheromone sprays mimic the feline facial pheromone that cats deposit when they rub their cheeks on objects they consider safe. Spraying the inside of the carrier — the blanket, the walls, the door frame — 15 to 20 minutes before placing your cat inside creates a chemical signal that says “this is a safe, familiar place.” The spray needs time to dry because the alcohol carrier can be off-putting to cats if it is still wet. Apply it to the blanket or towel rather than directly on the cat.
Carrier covers — a towel, blanket, or purpose-made cover draped over the carrier — reduce visual stimulation during transport. Cats are ambush predators whose stress response is triggered by unfamiliar sights passing at speed, which is exactly what happens in a car. A covered carrier blocks the visual chaos and creates a den-like environment that most cats find calming. Leave one side slightly uncovered for airflow, and choose a cover in a dark color to maximize the dimming effect.
Some owners also use calming supplements or treats containing L-theanine, tryptophan, or valerian root. These are generally safe but vary in effectiveness from cat to cat. They are best used as a complement to behavioral training, not a substitute for it. If your cat’s carrier anxiety is severe enough that behavioral approaches alone are not working, speak with your veterinarian about prescription anti-anxiety medication for travel days.
Carrier Types Comparison
Not all carriers are created equal, and the right one depends on your cat’s temperament, your travel frequency, and your storage situation. Here is a practical comparison of the main types.
Hard-sided plastic carriers: These are the most common and generally the best choice for cat carrier training. They are sturdy, easy to clean, provide good protection during car travel, and many models have both top and front openings. The rigid walls give cats a sense of enclosure without collapsing around them, and the bottom half can serve as an open bed when the top is removed. The downsides are weight and bulk — they are not easy to store and can be heavy to carry with a large cat inside.
Soft-sided carriers: Lightweight and often airline-compliant, soft carriers are convenient for travel but less ideal for training. They lack the structural rigidity that makes a carrier feel like a den, and a stressed cat can claw through the mesh panels. They are also harder to clean thoroughly. That said, a soft carrier with a top-loading zipper can work well for calm, well-trained cats who simply need a portable resting spot.
Backpack carriers: Popular for their hands-free convenience and sometimes featuring a transparent bubble window, backpack carriers are best suited for short outings with confident, curious cats. They are not recommended for vet visits or long car rides because the upright position is less natural for a resting cat, and they provide limited space for larger cats. They can be useful as a secondary carrier for socialized cats who enjoy watching the world.
Cardboard carriers: Provided by some shelters and veterinary clinics as temporary solutions, cardboard carriers are not suitable for anything beyond a single short trip. They absorb moisture, offer no security against a determined cat, and cannot be cleaned. Replace a cardboard carrier with a proper hard-sided one as soon as possible.
Wire or metal crate carriers: More common for dogs, wire crates provide maximum ventilation but almost no visual security for a cat. Most cats find the open visibility stressful. If you already own a wire crate, draping it with a thick blanket converts it into something more cat-friendly, but a purpose-built cat carrier is a better long-term investment.
Car Travel Tips
The car ride is often the most stressful part of any carrier experience, and a few adjustments can make a significant difference in your cat’s comfort level.
Secure the carrier. Place the carrier on the floor of the back seat or on the seat itself with a seatbelt threaded through the handle. A carrier that slides across the seat during braking or turning adds motion-based stress to an already anxious cat. The floor of the back seat is often the most stable location because it is lower, darker, and less prone to movement.
Control the environment. Keep the car temperature moderate — cats overheat faster than humans in warm vehicles. Turn the radio off or keep it on a low-volume station with calm music. Avoid sudden acceleration, hard braking, and sharp turns. Drive smoothly and predictably. If possible, crack a window slightly for fresh air circulation but never enough for a paw to reach through.
Do not open the carrier in the car. No matter how much your cat meows, do not open the carrier door while the vehicle is in motion. A loose cat in a car is a danger to itself and to the driver. Cats have gotten under brake pedals, behind dashboards, and out of partially open windows. The carrier stays closed from the moment you leave the house until you are safely inside the veterinary clinic or your destination.
Manage motion sickness. Some cats drool, vomit, or defecate during car rides due to motion sickness. Withholding food for four to six hours before travel can reduce the severity of nausea. Line the carrier with an absorbent pad or puppy pad underneath the blanket for easy cleanup. If your cat consistently experiences motion sickness, your veterinarian can prescribe anti-nausea medication for travel days.
Practice short trips. As part of your cat carrier training, take short drives that do not end at the vet. Drive around the block and come home. Drive to a friend’s house and sit in the driveway. The goal is to break the association between the car and the veterinary clinic, so your cat learns that car rides are sometimes just car rides.
Emergency Carrier Use
Natural disasters, fires, gas leaks, and other emergencies do not announce themselves, and the ability to get your cat into a carrier quickly can be the difference between evacuating with your pet and leaving it behind. This is one of the strongest arguments for ongoing cat carrier training — a cat that is comfortable with a carrier can be secured and transported in under a minute.
Keep your carrier accessible at all times. It should never be buried in a closet, stored in a garage, or disassembled into pieces that take five minutes to put together. If you followed the advice in this guide and the carrier is already sitting in your living room as a permanent piece of cat furniture, you are ready.
Prepare an emergency kit that lives near or inside the carrier. Include a three-day supply of food, a small collapsible water bowl, any medications your cat takes, a copy of vaccination records, and a recent photo of your cat in case you are separated. A zip-top bag with a familiar-scented blanket can also help calm your cat in an unfamiliar evacuation environment.
Practice your emergency routine. Set a timer and see how quickly you can get your cat into the carrier and out the front door. If it takes more than two minutes, identify the bottleneck. Is the carrier hard to reach? Is your cat hiding in a spot you cannot access? Address these issues now, while there is no emergency, so they do not become life-threatening problems later.
If you live in an area prone to wildfires, hurricanes, or flooding, have two carriers — one for everyday use and one stored in a grab-and-go location near your front door or in your vehicle. Redundancy is cheap insurance when your cat’s life is at stake.
Frequently Asked Questions
How long does cat carrier training take?
Most cats show significant improvement within four to six weeks of consistent daily desensitization. Kittens and cats with no prior negative carrier experiences may become comfortable in as little as two weeks. Older cats or those with deeply rooted carrier fear may need eight to twelve weeks. The key variable is consistency — a few minutes of practice every day is far more effective than occasional longer sessions. Skipping days or rushing through steps almost always results in setbacks.
Can I train an older cat to accept a carrier?
Yes. Older cats can absolutely learn to accept a carrier, though the process often takes longer than it does with younger cats. Senior cats have had more years to build negative associations with carriers, and they tend to be more resistant to changes in routine. The same desensitization steps apply — leave the carrier out, use treats and meals, progress gradually through door closure and lifting. Be especially patient with older cats, and never force the process. Even partial improvement — entering the carrier with gentle encouragement rather than a full-blown struggle — is a meaningful win.
What if my cat refuses to go near the carrier at all?
Start further back in the process than you think you need to. If your cat will not approach the carrier, remove the top entirely and leave just the bottom half as an open bed with a familiar blanket inside. Place treats several feet away from the carrier, then gradually move them closer over the course of a week. You can also try placing a worn T-shirt of yours inside the carrier base to make it smell safe. Some cats respond well to catnip sprinkled inside. The critical rule is to never pick your cat up and place it in the carrier during training — every entry must be voluntary, or you risk reinforcing the fear you are trying to eliminate.
Should I use a carrier with a top-loading or front-loading door?
A carrier with both options is ideal. For daily training and voluntary entry, a front-loading door works well because it mimics walking into a den. For vet days and situations where you need to place the cat inside, a top-loading door is significantly less stressful because you can lower the cat in gently rather than pushing it headfirst through a narrow opening. Many of the best carriers designed for cats include both a front door and a top door, giving you flexibility as your cat’s comfort level grows.
Is it okay to put two cats in one carrier?
Generally, no. Even bonded cats can become aggressive toward each other when stressed in a confined space. Each cat should have its own carrier. The only exception might be very young kittens from the same litter who are calm and small enough to share a carrier comfortably, but even then, having separate carriers is safer. During emergencies, if you only have one carrier, prioritize the cat that is hardest to catch and use a pillowcase or sturdy bag as a temporary containment for the second cat until you can secure a second carrier. Browse our adoption page to learn more about bringing a new cat into your household.
Do calming pheromone sprays really work for carrier training?
Research on synthetic feline facial pheromones shows modest but measurable reductions in stress-related behaviors, including vocalization, hiding, and aggression during transport. They are not a miracle solution and will not calm a severely panicked cat on their own, but they are a useful addition to a broader desensitization program. Spray the inside of the carrier — particularly the bedding — 15 to 20 minutes before use and allow it to dry completely. The pheromone works best as one layer in a multi-step approach that includes behavioral training, a comfortable carrier, and a calm handling technique.


