
Last updated: April 1, 2026
In this article
How to Clean Cat Ears: A Safe, Step-by-Step Guide for Cat Owners
Ear care is an often-overlooked part of cat grooming, but keeping your cat’s ears clean and healthy is an important aspect of their overall wellbeing. While cats are famously fastidious self-groomers, their ears are one area they cannot maintain on their own. Regular ear checks and occasional cleaning can help you catch problems early, prevent infections, and keep your feline friend comfortable.
Many cat owners feel nervous about cleaning their cat’s ears, worried they might hurt their pet or do something wrong. The truth is that with the right supplies, proper technique, and a gentle approach, ear cleaning can be a quick, stress-free process for both you and your cat. This guide will walk you through everything you need to know, from recognizing when cleaning is needed to performing the cleaning safely and knowing when to call the vet. If your cat is already showing signs of an ear problem, our guide on cat ear infection treatment can help you understand your options.
Understanding Your Cat’s Ear Anatomy
Before you begin cleaning your cat’s ears, it helps to understand their basic anatomy. A cat’s ear has three main sections: the outer ear (pinna and ear canal), the middle ear, and the inner ear. When you clean your cat’s ears at home, you are only addressing the outer ear, specifically the visible part of the ear flap and the portion of the ear canal that you can see.
The cat’s ear canal is shaped like a letter L. It first descends vertically, then takes a nearly horizontal turn toward the eardrum. This L-shape is important to understand because it means the eardrum is not directly accessible when you are cleaning the outer ear, which provides a natural margin of safety. However, it also means debris and moisture can accumulate in the bend of the canal, creating a warm, moist environment where bacteria and yeast can thrive.
Healthy cat ears should be pale pink on the inside, clean, and free of significant wax buildup. A small amount of light brown or yellowish wax is normal. The ears should not have a strong odor, and the skin inside should be smooth and free of redness, swelling, or sores. Each cat is different in terms of how much wax they naturally produce, so get to know what is normal for your particular cat.
Certain breeds and individual cats produce more ear wax than others. Cats with folded ears, like Scottish Folds, may need more frequent ear care because their ear structure limits airflow and can trap moisture and debris. Similarly, cats that spend time outdoors may pick up more dirt and are at greater risk for ear mites and other parasites.
When and How Often to Clean Your Cat’s Ears
One of the most common mistakes cat owners make is cleaning their cat’s ears too frequently. Unlike dogs, most cats do not need routine ear cleaning. Over-cleaning can strip away protective natural oils and wax, irritate the delicate ear canal lining, and actually increase the risk of infection. For most healthy cats, a visual ear check once a week is sufficient, with actual cleaning only when needed.
You should clean your cat’s ears when you notice visible wax buildup that is more than the usual thin coating, when you see dirt or debris inside the ear, when your veterinarian recommends cleaning as part of a treatment plan for an ear condition, or before administering prescribed ear medications so the medication can reach the affected tissue.
Signs that your cat’s ears need attention include visible dark brown or black debris (which may indicate ear mites), a noticeable yeasty or foul odor coming from the ears, your cat shaking their head frequently, your cat scratching at their ears excessively, redness or swelling inside the ear, discharge of any color, and your cat tilting their head to one side. If you observe these signs, check with your vet before cleaning, as some conditions require specific treatment rather than routine cleaning.
Supplies You Will Need
Gathering everything you need before you start makes the process smoother and faster, which your cat will appreciate. Here is what you will need for a safe at-home ear cleaning:
Veterinary-approved ear cleaning solution: Use only products specifically formulated for cats. Never use hydrogen peroxide, alcohol, vinegar, or water in your cat’s ears. These can irritate the ear canal, damage tissue, and worsen existing conditions. Your vet can recommend a suitable product, or you can find cat-specific ear cleaners at pet supply stores. Look for products with gentle, pH-balanced formulas.
Cotton balls or gauze pads: These are used to wipe away loosened debris and excess solution. Cotton balls are soft and conform to the shape of the ear, making them ideal for this purpose.
Treats: Having your cat’s favorite treats on hand helps create a positive association with ear cleaning. Reward your cat before, during, and after the process.
A towel: Wrapping your cat in a towel (a technique sometimes called a “purrito”) can help keep them calm and prevent scratching. A second towel under the work area catches any drips.
What NOT to use: Never insert cotton swabs (Q-tips) into your cat’s ear canal. While they may seem like the obvious tool for ear cleaning, they can push debris deeper into the canal, pack wax against the eardrum, and potentially rupture the eardrum if your cat moves suddenly. Cotton swabs can be used only on the outer ear flap where you can see exactly what you are doing.
Step-by-Step Ear Cleaning Process
With your supplies gathered and your cat in a calm, relaxed state, follow these steps for safe, effective ear cleaning:
Step 1: Get your cat comfortable. Choose a time when your cat is relaxed, perhaps after a meal or a play session. Sit on the floor or at a table with your cat in your lap or on a stable surface. If your cat tends to squirm, gently wrap them in a towel with only their head exposed. Have a helper hold the cat if needed, but avoid restraining your cat too tightly, as this increases stress.
Step 2: Examine the ear. Gently fold back the ear flap and look inside. Assess the color, the amount and type of any discharge or wax, and check for redness, swelling, or sores. If you see anything that looks concerning, such as heavy dark debris, strong odor, significant redness, or signs of pain, stop and consult your vet before proceeding.
Step 3: Apply the cleaning solution. Hold the ear flap up gently and squeeze the recommended amount of cleaning solution into the ear canal. The bottle tip should be near the ear opening but should not be inserted into the canal. If the bottle tip touches your cat’s ear, clean it with alcohol before using it on the other ear to prevent cross-contamination.
Step 4: Massage the base of the ear. Fold the ear flap down and gently massage the base of the ear for 20 to 30 seconds. You should hear a squishing sound as the solution moves through the canal and loosens debris. This is the most important step, as the massaging action is what breaks up wax and debris deep in the canal where you cannot reach.
Step 5: Let your cat shake. Release the ear and step back slightly. Your cat will almost certainly shake their head vigorously, which is exactly what you want. The shaking helps bring loosened debris and excess solution up and out of the ear canal. This is where the towel on your work surface comes in handy, as the solution that flies out may contain dislodged wax and debris.
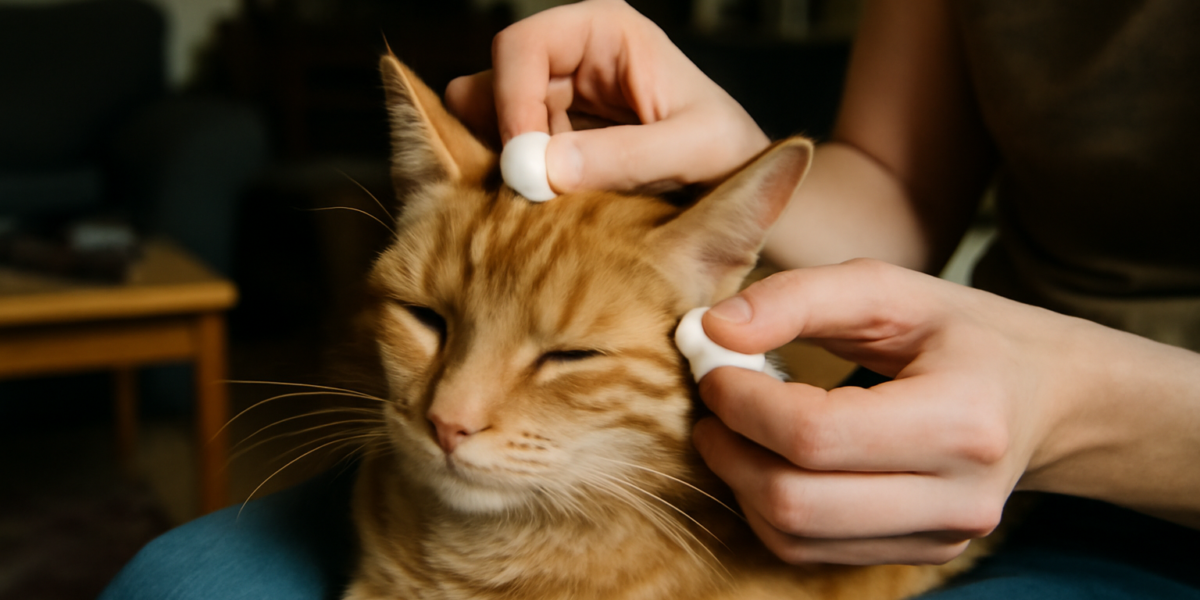
Step 6: Wipe away debris. Using a cotton ball or gauze pad, gently wipe out the visible part of the ear canal and the inner ear flap to remove loosened debris and excess solution. Do not push the cotton ball deep into the canal. Only clean what you can easily see and reach.
Step 7: Repeat on the other ear. Use fresh cotton balls and, if the bottle tip contacted the first ear, clean it before using the same solution on the second ear.
Step 8: Reward your cat. Finish with plenty of treats and gentle praise. This positive ending helps your cat associate ear cleaning with good things, making future sessions easier.
Making Ear Cleaning Less Stressful for Your Cat
Cats are creatures of habit, and introducing any new handling or grooming procedure can be met with resistance. Here are strategies to make ear cleaning as stress-free as possible:
Start by getting your cat accustomed to having their ears touched before you ever attempt cleaning. Over several days or weeks, practice gently handling your cat’s ears during relaxed petting sessions. Touch the ear flaps, fold them back briefly, and reward your cat with treats. This desensitization process teaches your cat that ear handling is not threatening.
Keep your own energy calm and positive. Cats are remarkably sensitive to their owner’s emotional state. If you are nervous or tense, your cat will pick up on that energy and become anxious too. Approach ear cleaning as a casual, no-big-deal activity rather than a dreaded procedure.
Work quickly but gently. The faster you can complete the cleaning while still being thorough and gentle, the better. Most cats tolerate short procedures well but become increasingly resistant as time drags on. With practice, you should be able to clean both ears in under five minutes.
Never force the issue. If your cat becomes extremely stressed, aggressive, or panicked, stop and try again another time. Forcing ear cleaning on a frightened cat damages trust and makes future attempts much harder. Some cats do better with two people, one to hold and comfort while the other cleans. If at-home cleaning remains too stressful, your vet or a professional groomer can perform the cleaning in a way that minimizes stress.
Ear cleaning is just one part of a complete cat grooming routine. Integrating ear checks into your regular grooming schedule makes them feel like a normal part of life rather than an unusual event.
Signs of Ear Problems That Need Veterinary Attention
While routine ear cleaning is something you can handle at home, certain ear issues require professional veterinary care. Contact your vet if you notice any of the following:
Dark, coffee-ground-like debris in the ears, which is a classic sign of ear mites. While ear mites are treatable, they need proper diagnosis and specific medication prescribed by your vet.
A strong, unpleasant odor from one or both ears, which often indicates a bacterial or yeast infection. Ear infections require appropriate medication, and cleaning alone will not resolve them.
Significant redness, swelling, or warmth inside the ear, indicating inflammation or infection. Your cat may also show signs of pain when the ear is touched.
Any discharge that is yellow, green, bloody, or unusually dark. Colored discharge suggests infection that needs targeted treatment.
Head tilting, loss of balance, circling, or unusual eye movements (nystagmus). These neurological signs can indicate a middle or inner ear infection, which is more serious than an outer ear infection and requires prompt veterinary care.
Swelling of the ear flap itself, which may indicate an aural hematoma. This occurs when a blood vessel in the ear flap ruptures, usually from excessive head shaking or scratching. Aural hematomas typically require veterinary treatment to drain and may need surgery to prevent permanent ear deformity.
Any lumps, bumps, or growths inside or on the ear. While many ear growths are benign, they should be evaluated by your vet to rule out more serious conditions.
Frequently Asked Questions
How often should I clean my cat’s ears?
Most healthy cats do not need regular ear cleaning. Check your cat’s ears weekly as part of their grooming routine, but only clean them when you notice visible wax buildup, dirt, or debris. Over-cleaning can actually cause irritation and increase infection risk. Some cats may go months without needing their ears cleaned, while others, particularly those with certain ear shapes or those prone to ear conditions, may need cleaning every few weeks. Follow your veterinarian’s guidance for your specific cat’s needs.
Can I use olive oil to clean my cat’s ears?
While olive oil has been used as a home remedy for loosening ear wax, veterinarians generally recommend using a product specifically formulated for cat ears instead. Cat-specific ear cleaners are pH-balanced for feline ears, often contain drying agents to prevent moisture buildup, and may include gentle antimicrobial ingredients. Olive oil can leave excess moisture in the ear canal, creating an environment where bacteria and yeast can thrive. If you want to use a natural approach, ask your vet for their recommendation on a suitable product.
My cat screams when I try to clean their ears. What should I do?
If your cat reacts with extreme distress or pain during ear cleaning, stop immediately. Screaming or extreme resistance may indicate that your cat has an existing ear condition such as an infection, ear mites, or a ruptured eardrum that is causing pain when the ear is touched or when solution enters the canal. Schedule a veterinary appointment to have your cat’s ears examined before attempting to clean them again. Your vet can treat any underlying condition and may prescribe pain management or sedation for future ear care if needed.
Is the dark wax in my cat’s ears normal or a sign of ear mites?
A small amount of light brown to yellowish wax is normal for cats. Dark brown or black debris that resembles coffee grounds is a classic sign of ear mites, especially if it is accompanied by excessive scratching, head shaking, or a foul odor. However, dark wax can also be caused by bacterial or yeast infections. The only way to know for certain is to have your vet examine a sample of the debris under a microscope. Do not attempt to treat ear mites with over-the-counter products without a proper diagnosis, as misdiagnosis can delay appropriate treatment for other conditions.


